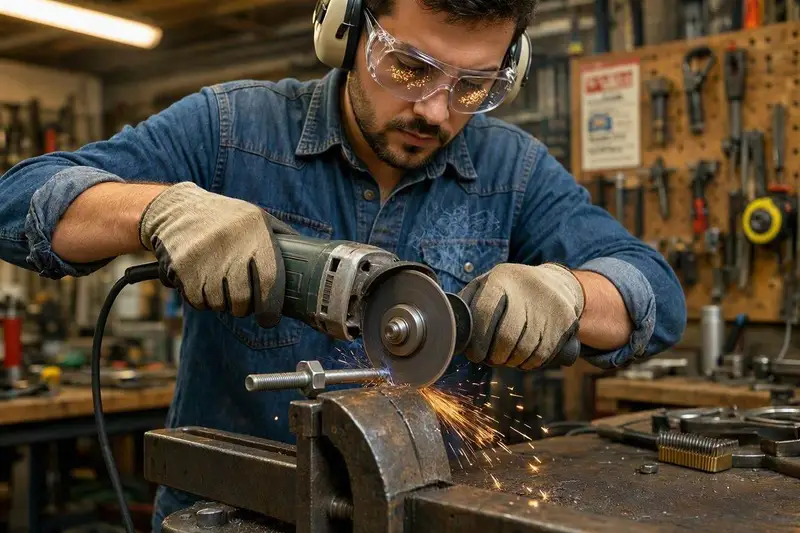
Learning how to cut metal with an angle grinder is a useful skill for DIY jobs such as cutting bolts, threaded rod, metal brackets, steel sections and sheet metal.
An angle grinder fitted with the correct metal cutting disc can make relatively quick cuts through suitable metal, but getting a good result depends on more than simply fitting a disc and switching the grinder on.
You need to choose a cutting disc that is suitable for the metal and your grinder, secure the workpiece properly and maintain control throughout the cut. The grinder’s guard should also remain correctly fitted and positioned between you and the rotating disc. HSE guidance specifically highlights the importance of keeping guards securely in place when using portable grinding machines.
In this beginner’s guide, we’ll explain how to cut metal with an angle grinder step by step, including how to choose the right disc, prepare the workpiece, make the cut and deal with the sharp edge that can remain afterwards.
We’ll also cover common mistakes and important safety considerations for anyone using an angle grinder for metal cutting for the first time.
Quick Answer: How to Cut Metal With an Angle Grinder
To cut metal with an angle grinder:
- Choose the correct metal cutting disc for your grinder and the material you’re cutting.
- Check the disc for damage and make sure its maximum operating speed is suitable for the grinder.
- Secure the metal firmly in a vice or with suitable clamps.
- Fit and position the guard correctly and wear appropriate eye and hearing protection.
- Start the grinder away from the workpiece and allow the disc to reach normal operating speed.
- Bring the disc into contact with the metal gradually and follow your marked cut line without forcing or twisting the grinder.
- Complete the cut and switch off the grinder before setting it down.
- Allow the metal to cool before handling it and remove any sharp burrs or edges using a suitable method.
The key is to use the right cutting disc, secure the workpiece and maintain control of the grinder throughout the cut.
Step‑By‑Step: How to Cut Metal With an Angle Grinder
Once you have the correct cutting disc and suitable angle grinder, the cutting process is relatively straightforward. The important thing is to prepare the workpiece properly and maintain control of the grinder throughout the cut.
1. Choose the Correct Cutting Disc
Start by selecting a metal cutting disc that is suitable for both the material you are cutting and your angle grinder.
Before fitting the disc, check:
- The disc diameter is compatible with your grinder
- The bore or mounting system is compatible
- The disc is intended for the type of metal you are cutting
- The maximum operating speed is suitable for your grinder
- The disc is undamaged and within its recommended service life, where applicable
Thin cutting discs can be useful for many DIY metal-cutting jobs, but don’t assume that the thinnest disc is always the correct choice. Follow the disc manufacturer’s instructions for the particular application.
2. Secure the Metal Properly
Secure the workpiece firmly before switching on the grinder.
A bench vice, suitable clamps or another appropriate method of support can be used depending on the size and shape of the metal.
Position the workpiece so that:
- It cannot move during cutting
- The section being removed is properly supported
- The cut line is accessible
- The grinder can be moved through the cut without hitting the vice, clamps or surrounding objects
Never try to hold a small piece of metal in your hand while cutting it with an angle grinder.
3. Mark the Cut Line
Mark the position of the cut clearly before starting.
For straight cuts, use a marker, scriber or another suitable method to create a visible line around the workpiece where practical.
Take a moment to check the measurement before cutting. Once the disc enters the metal, correcting an inaccurate cut can be difficult.
4. Check the Grinder and Guard
Before switching on, make sure the grinder is in good condition and the guard is correctly fitted and positioned.
Check that:
- The cutting disc is securely mounted
- The spindle and flange are correctly fitted
- The guard is suitable for the operation
- The disc is not contacting the guard or workpiece
- The power cable or battery is in good condition
- The switch is in the correct position before connecting power
Do not use the grinder if the disc or guard appears damaged or incorrectly fitted.
5. Position Yourself Correctly
Hold the grinder securely with both hands where the grinder is designed for two-handed operation.
Adopt a stable stance and position yourself so that you can maintain control if the tool moves unexpectedly.
Keep your hands clear of the rotating disc and avoid positioning yourself directly in line with the disc.
Wear appropriate eye protection and hearing protection, and use any other PPE required by the grinder and disc manufacturer’s instructions.
6. Start the Grinder Away From the Metal
Switch on the grinder while the disc is clear of the workpiece. Allow the grinder to reach its normal operating speed before bringing the cutting disc into contact with the metal, following the manufacturer’s instructions.
If you notice unusual vibration, wobbling or other abnormal behaviour, switch the grinder off and investigate before continuing.
7. Begin the Cut Gradually
Bring the cutting disc into contact with the metal in a controlled manner. Follow your marked line and allow the disc to remove the material without excessive pressure.
Do not force the grinder through the metal.
Avoid twisting, levering or applying sideways pressure to the cutting disc. Keep the grinder under control and make the cut using the method recommended by the disc manufacturer.
8. Complete the Cut Carefully
As you approach the end of the cut, maintain control of the grinder and be aware that the workpiece may move or separate. Do not twist the grinder to try to finish the cut more quickly.
Once the cut is complete, move the grinder clear of the workpiece and switch it off. Keep holding the grinder securely until the disc has stopped rotating.
Never put the grinder down while the disc is still rotating.
9. Deal With the Cut Edge
Freshly cut metal can have sharp edges and burrs, so don’t immediately handle the cut section with bare hands.
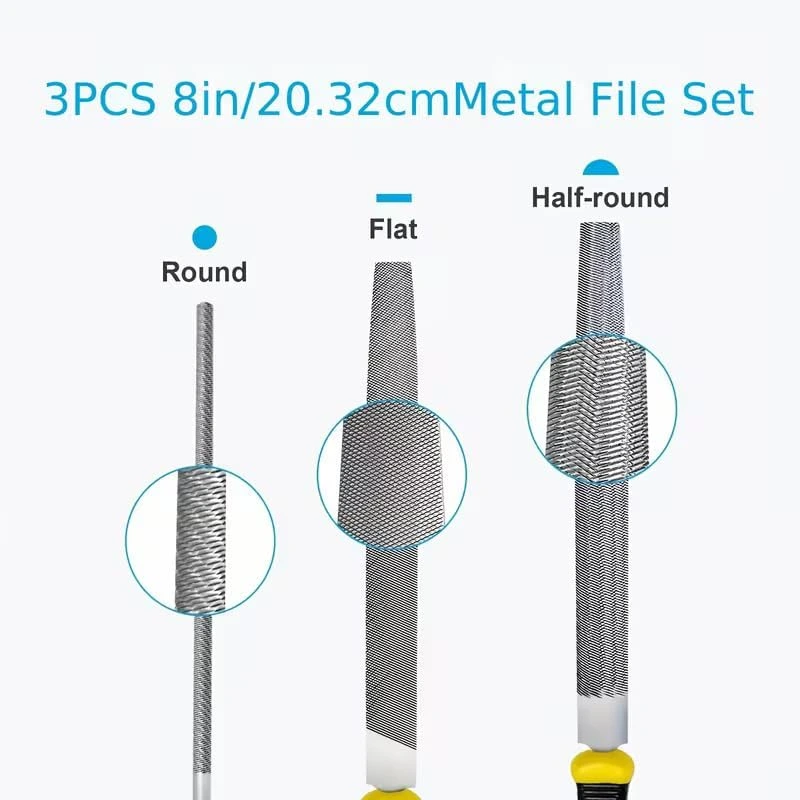
Allow hot metal to cool before handling it. Depending on the job, you can then use a suitable file, deburring tool or appropriate finishing accessory to remove sharp edges.
If you use another angle-grinder accessory for finishing, make sure it is specifically suitable for that operation and follow its manufacturer’s instructions.
A Simple Cutting Routine for Beginners
For most straightforward metal-cutting jobs, remember:
Choose the right disc → secure the metal → mark the cut → check the guard → start the grinder clear of the workpiece → make a controlled cut → switch off → allow the disc to stop → deal with the sharp edge.
Taking a little extra time to prepare the workpiece and check the grinder can make the cutting process much more controlled than simply switching on and cutting immediately.
Which Disc Should You Use?
FoWhich Cutting Disc Should You Use?
The right cutting disc depends on the metal you are cutting, the grinder you are using and the particular job. There isn’t one disc thickness or type that is automatically best for every situation.
For general DIY metal cutting, look for a cutting disc that is specifically designed for the material and application.
| Disc type | Typical use |
|---|---|
| Thin metal cutting disc | Fast, controlled cutting of suitable sheet metal, brackets, bolts and smaller sections |
| Thicker reinforced cutting disc | Cutting suitable metal where a more robust disc is specified for the application |
| 115mm cutting disc | Suitable for compatible 115mm angle grinders |
| 125mm cutting disc | Suitable for compatible 125mm angle grinders |
Check the Disc Before Fitting
Always check the information printed on the disc and its packaging.
Make sure:
- The disc is suitable for the metal you are cutting
- The diameter matches your grinder
- The bore or mounting system is compatible
- The disc’s maximum operating speed is suitable for your grinder
- The disc is intended for cutting rather than grinding
- The disc is undamaged and in good condition
A thin disc can be useful when making many general-purpose DIY cuts, but don’t choose a disc purely because it is thinner. Follow the manufacturer’s recommendations for the material and application.
Also remember that a cutting disc is designed for cutting. Do not use the side of a conventional cutting disc for grinding or other operations unless the manufacturer specifically states that the disc is designed for that purpose.
For a fuller explanation of the different types of angle-grinder accessories, see my guide to Angle Grinder Discs Explained.
You can also read my guide to Best Angle Grinder Discs for Metal if you want more information about choosing discs for different metalworking jobs.
- Thin metal cutting disc (1–1.2mm) → fastest, cleanest cuts
- Reinforced cut‑off wheel → safer for beginners
- 115mm or 125mm → standard UK sizes
Beginner Tips for Cleaner Cuts
Getting a clean metal cut with an angle grinder takes a little practice. These simple tips can help you produce more consistent results.
Mark the Cut Clearly
Measure carefully and mark the cut line clearly before starting. A visible line makes it easier to keep the disc where you want it.
For longer cuts, you can mark both sides of the material where practical so you can check that the cut remains aligned.
Support the Workpiece Properly
Good support can make a noticeable difference to the quality of the cut.
Secure the metal so it cannot move or vibrate excessively, and make sure the section being cut away is supported appropriately.
Let the Disc Do the Work
Avoid forcing the grinder through the metal.
Apply controlled pressure and allow the cutting disc to remove the material at its intended rate. Excessive pressure can make the grinder harder to control and may produce a rougher cut.
Keep the Grinder Controlled
Try to maintain a consistent movement through the cut.
Avoid twisting, levering or applying sideways pressure to the cutting disc. If the cut starts to wander, don’t try to force the disc back onto the line. Stop, switch off and reassess your position.
Use the Correct Disc
A disc that is suitable for the material and application can make a significant difference.
Check the disc manufacturer’s instructions rather than automatically choosing the thinnest disc available.
Don’t Rush the Final Part of the Cut
Take particular care as you approach the end of the cut.
The metal may move or separate as the cut is completed, so maintain control of the grinder and avoid twisting the disc to finish the job quickly.
Deal With Burrs Afterwards
Even a well-executed cutting-disc cut can leave a sharp edge or burr.
Once the metal has cooled, use a suitable file or deburring tool to remove sharp edges. For larger finishing jobs, use an accessory specifically designed for that application and follow its manufacturer’s instructions.
With practice, a clear cut line, secure workpiece, correct disc and controlled pressure will usually make more difference than simply trying to cut faster.
Common Mistakes to Avoid
Cutting metal with an angle grinder is relatively straightforward once you have the correct setup, but beginners can easily make mistakes that affect the cut or make the grinder harder to control.
Using a Grinding Disc to Cut
A conventional grinding disc is not a substitute for a cutting disc.
Use an accessory specifically designed for cutting metal and follow the manufacturer’s instructions for the disc.
Using a Damaged or Unsuitable Disc
Never use a disc that is cracked, chipped, damaged or otherwise appears unsuitable.
Also check the disc’s diameter, mounting arrangement, intended application and maximum operating speed before fitting it to the grinder.
Cutting Without Securing the Metal
Trying to hold metal by hand while cutting can allow the workpiece to move unexpectedly.
Secure the material using a suitable vice, clamps or another appropriate method before starting the cut.
Forcing the Grinder
Applying excessive pressure doesn’t necessarily make the job faster.
Let the cutting disc do the work and maintain controlled pressure. If the grinder starts struggling or behaving unusually, stop and check the setup rather than forcing it through the material.
Twisting the Cutting Disc
Avoid twisting, levering or applying sideways pressure to a conventional cutting disc.
Keep the grinder under control and follow the cutting method specified by the disc manufacturer.
Ignoring the Guard
The guard is an important part of the grinder’s protection system.
Make sure it is correctly fitted and positioned before cutting, and never remove it simply to make the job easier.
Standing Directly in Line With the Disc
Position yourself so you can maintain control of the grinder without placing yourself directly in line with the rotating disc.
Keep other people away from the immediate work area as well.
Rushing the End of the Cut
The workpiece can move or separate as the cut is completed.
Maintain control of the grinder until the disc has cleared the workpiece, then switch off and keep hold of the tool until the disc has stopped rotating.
Handling the Metal Immediately
Freshly cut metal can be hot and the cut edge can be extremely sharp.
Allow the material to cool before handling it and remove burrs or sharp edges using a suitable method.
Cutting Without Checking What Is Behind the Workpiece
Before starting, check the area around and behind the material you are cutting.
Make sure the disc has a clear path and that you are not going to contact a vice, clamp, supporting surface, cable or another object as the cut progresses.
If you’re learning how to cut metal with an angle grinder, the most important things to remember are to use the correct cutting disc, secure the workpiece properly and maintain control throughout the cut.
For beginners, the simplest approach is to slow down, secure the workpiece, use the correct disc and concentrate on maintaining control rather than trying to finish the cut as quickly as possible.
Safety Essentials
Always wear:
- Safety glasses or face shield
- GlovesSafety Essentials
- Cutting metal with an angle grinder involves a rapidly rotating abrasive disc, hot material, sparks and potentially sharp edges. Taking a few basic precautions before starting can reduce the risk of injury and equipment problems.
- Wear Appropriate Eye and Face Protection
- Wear suitable eye protection whenever using an angle grinder.
- Depending on the job and the manufacturer’s guidance, additional face protection may also be appropriate, particularly where there is a risk of flying particles.
- Use Hearing Protection
- Angle grinders can produce high noise levels, particularly when cutting metal.
- Use suitable hearing protection where required and avoid prolonged exposure to the noise produced by the grinder.
- Wear Suitable Clothing
- Wear suitable work clothing and sturdy footwear.
- Keep loose clothing, jewellery and anything else that could become caught in the rotating tool away from the grinder.
- Use the Correct Guard
- Make sure the grinder has the correct guard fitted and positioned for the operation.
- Never remove the guard simply because it makes the cut easier to see. Follow the grinder manufacturer’s instructions for the correct guard and setup.
- Secure the Workpiece
- Always secure the metal before cutting.
- A suitable vice, clamps or another appropriate support method can prevent the workpiece from moving unexpectedly during the cut.
- Be Aware of Sparks and Hot Metal
- Metal cutting can produce sparks and hot fragments.
- Clear flammable materials from the immediate work area and consider where sparks and hot particles are travelling before starting.
- Remember that the metal itself can become hot during cutting, so allow it to cool before handling it.
- Control Dust and Fumes
- Cutting painted, coated, rusty or treated metal can produce dust or fumes that you should avoid breathing.
- Use suitable ventilation and dust or respiratory protection where appropriate for the material and working conditions. If you are unsure what a coating contains, investigate it before cutting rather than assuming it is harmless.
- Check the Disc Before Use
- Inspect the cutting disc before fitting it and do not use it if it is damaged or otherwise unsuitable.
- Check that the disc is compatible with the grinder and that its maximum operating speed is suitable for the machine.
- Never Use the Side of a Cutting Disc for Grinding
- A conventional cutting disc is designed for cutting.
- Do not use its side to grind or remove material unless the manufacturer specifically states that the disc is designed for that operation. Use a suitable grinding or finishing accessory instead.
- Switch Off Before Setting the Grinder Down
- When you have finished the cut, switch off the grinder and keep holding it until the disc has completely stopped rotating.
- Never place the grinder down while the disc is still moving.
- Follow the Manufacturer’s Instructions
- Your grinder and cutting disc may have specific requirements for guards, mounting, operating speed and applications.
- Always follow the manufacturer’s instructions for the equipment you are using.
- For more detailed guidance on abrasive-wheel safety, see the UK Health and Safety Executive (HSE) guidance on the safe use of abrasive wheels.
- The basic rule is simple: use the correct disc, secure the workpiece, keep the guard fitted and maintain control of the grinder throughout the cut.
- Ear protection
- Dust mask (especially for rusty or painted metal)
For more detailed guidance, see the HSE’s Safety in the Use of Abrasive Wheels guidance.
For full safety guidance, see: How to Use an Angle Grinder Safely