By Enda McLarnon — Experienced UK DIYer sharing practical fixes from my 1958 red brick home.
You could be working on putting up a bookshelf, some timber battens, or fixing a garden gate. Drilling into wood feels like it should be the easiest part of DIY.
Yet every beginner eventually experiences the sinking feeling of driving a screw into the end of a piece of timber, only for the wood grain to violently split apart, ruining your efforts.
Wood is a natural material with a grain structure that runs in one direction. When you force a screw or drill bit into timber without preparation, you act like a wedge. This forces the fibres apart rather than cutting through them.
This step-by-step guide covers the simple techniques to use to drill and screw into wood cleanly every single time.
The 3 Golden Rules of Wood Drilling
Before you reach for your drill, keep these three fundamentals in mind:
- Never screw directly into the edge grain: The outer edges and ends of timber split much more easily than the flat face.
- Always use a pilot hole for screws: Especially near ends or corners.
- Match your drill bit to the screw shank: Not the threads!
Step-by-Step: How to Drill a Pilot Hole
A pilot hole is a small hole drilled into the wood before you insert a screw. It carves out a clear path for the screw shank, relieving internal pressure so the wood doesn’t split.
- Pick a small drill bit – thinner than the screw shaft
- Drill pilot hole – through the top timber
- Drive screw safely – no splitting or bulging
Step A: Choose the Right Bit Size
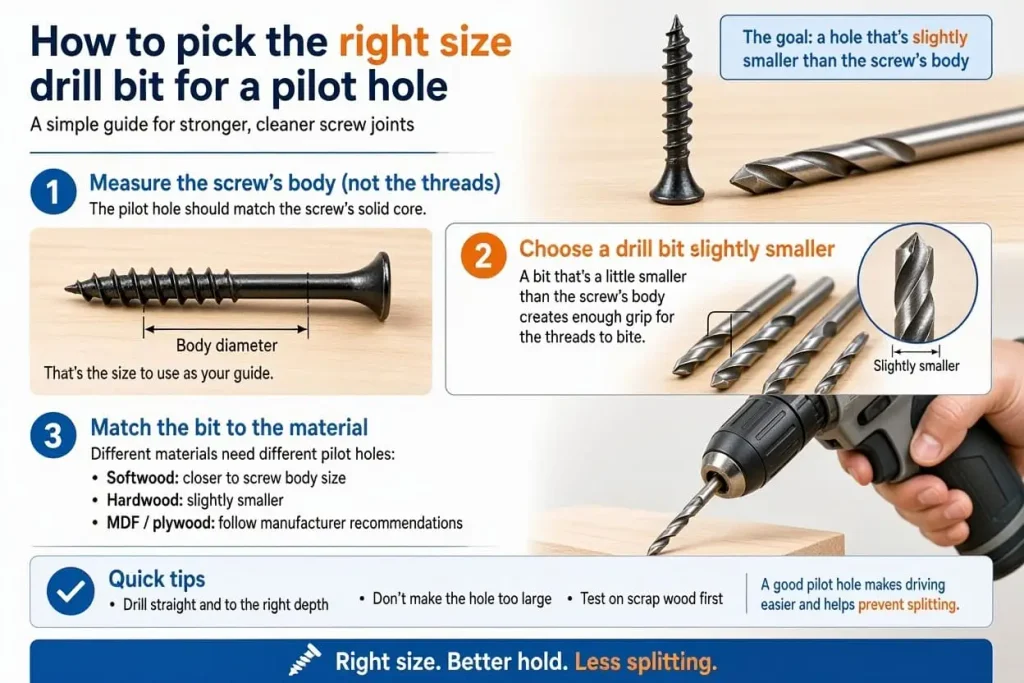
Your pilot drill bit should match the solid centre shank of your screw (ignoring the spiral threads).
- If you hold your screw up against a set of standard wood drill bits, the correct bit should match the inner solid metal shaft exactly, while letting the outer threads poke out on either side.
- Quick Reference: For a standard 4.0mm wood screw (No. 8), use a 3mm wood drill bit for your pilot hole.
Step B: Mark and Clamp
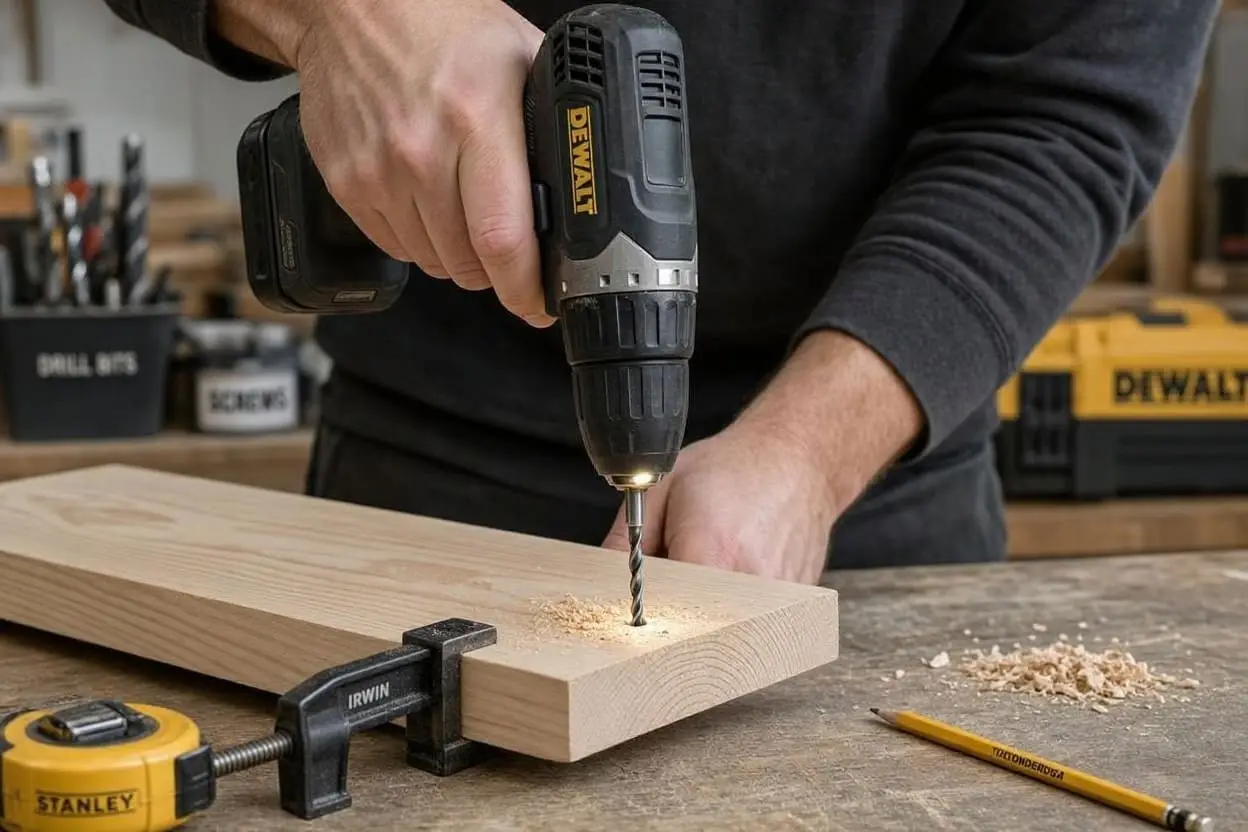
Measure twice and mark your drilling spot with a pencil. If you are working with smaller pieces of timber on a workbench, secure the wood with a G-clamp so it doesn’t twist or lift while you drill.
Step C: Set Your Combi Drill Correctly
- Mode: Switch to the Drill Bit Icon (Standard Drilling Mode). Never use hammer mode on wood!
- Gear: Set your top gear switch to Gear 2 (High speed) for clean cutting.
- Speed: Hold the drill steady with both hands, gently pull the trigger, and push straight down. Pull the bit out once or twice to clear wood shavings out of the flutes.
3. How to Countersink Your Screws (For a Professional Finish)
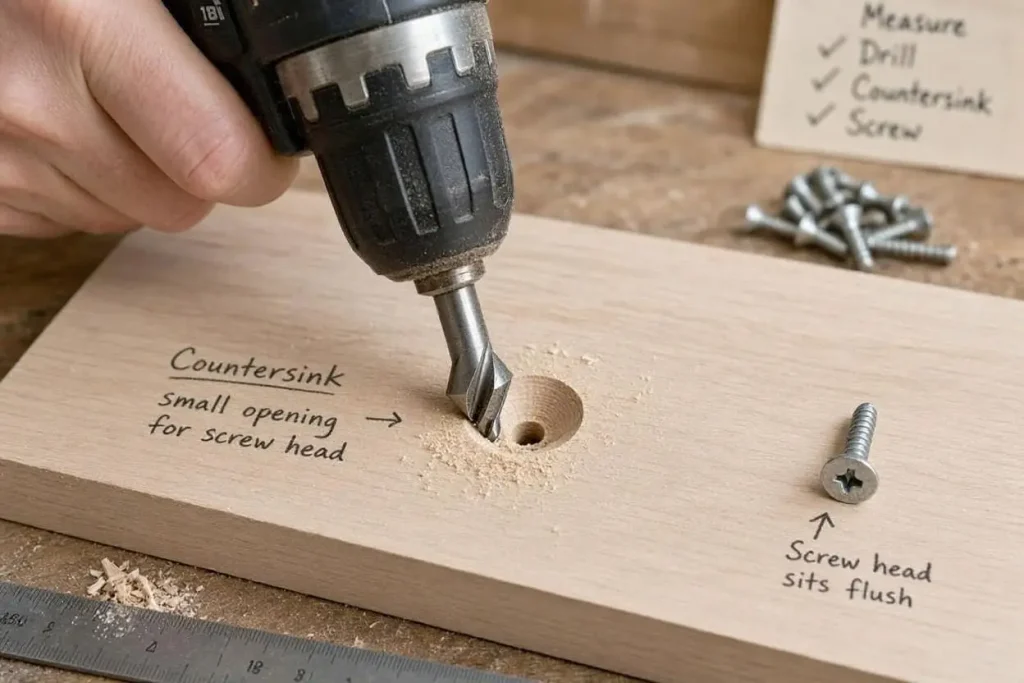
Have you ever driven a screw into wood and noticed the top of the screw head sticks out slightly above the surface, catching your finger or ruining the flat finish?
To fix this, you need to countersink the hole:
- Drill your pilot hole as normal using a standard wood bit.
- Switch to a Countersink Bit (a cone-shaped cutting bit) or use a specialized combi countersink bit.
- Spin it briefly in the pilot hole: The cone-shaped head carves out a small, angled recess into the top of the wood.
- Drive your screw: The screw head now sinks flush or slightly below the timber surface, ready to be filled with wood filler if you want a seamless painted finish.
4. Preventing “End-Grain Splitting” (The Danger Zone)
The most common place for wood to split is at the end grain—the very ends of a plank where the cut fibers are fully exposed. If you try to drive a screw 10mm from the end of a pine board without a pilot hole, it will crack almost every time.
How to Beat It:
- Pre-drill with a slightly tighter tolerance: Use a pilot bit that matches almost the full width of the screw.
- Move further from the edge: Whenever possible, try to place your screws at least 25mm to 30mm away from the raw end of a timber board.
- Switch to a Torx decking screw: Modern structural screws often feature a “Type 17” cutting slash on the tip that slices through wood fibers rather than wedging them apart.
Real-World Lesson: The Split Bookshelf Wall
When I was building my first garage shelving unit out of standard 2x4CLS timber, I was in a rush to finish before dark. I grabbed a handful of 50mm wood screws and tried to screw straight through the end of a cross-beam into a vertical upright without pre-drilling.
Midway through driving the screw, I heard a sharp CRAP sound. The entire corner of the pine beam split clean off along the wood grain line, rendering the board structurally useless. I had to unbolt the frame, make a trip to the timber merchant for a replacement piece, and waste another hour re-cutting.
Since then, I never drive a screw near the edge of timber without spending 10 seconds drilling a quick pilot hole. It takes zero extra effort and guarantees your timber stays intact.
Frequently Asked Questions
Can I use a masonry drill bit on wood?
No. Masonry bits have a blunt, flattened carbide tip designed to crush brick using a hammer action. If you use a masonry bit on wood, it will tear, burn, and scorch the timber fibers rather than cutting a clean hole. Use proper twisted brad-point or standard high-speed steel (HSS) wood bits.
Why is my wood drill bit smoking when I drill?
If smoke or a burning smell appears, your drill speed is either too high causing friction, or your bit has gone blunt. Back the drill out of the hole, let it cool down, and check if the cutting edges of the bit are caked in resin or dull.
Do self-tapping wood screws need pilot holes?
Some modern heavy-duty timber screws are marketed as “no pre-drill required.” While they work well in softwoods, you should still pre-drill if you are working near the edge of a board or using hardwoods like oak or beech, otherwise even self-tappers can cause splitting.
Next Steps & Related Guides
This article is part of our [Ultimate Beginner’s Guide to Combi Drills]. Explore more of our hands-on guides below:
- [Combi Drill Settings Demystified: Torque, Gears, and Modes]
- [Screwdriver Bits Explained: PZ vs PH vs Torx]
- [How to Drill into UK Brick and Mortar Walls Safely]
About the Author: Enda McLarnon
I’m an experienced UK DIYer tackling renovation life inside a 1958 red brick home.
I built this blog to help beginners conquer home maintenance anxiety and save a fortune on expensive trade calls.