Can You Cut Timber With a Circular Saw?
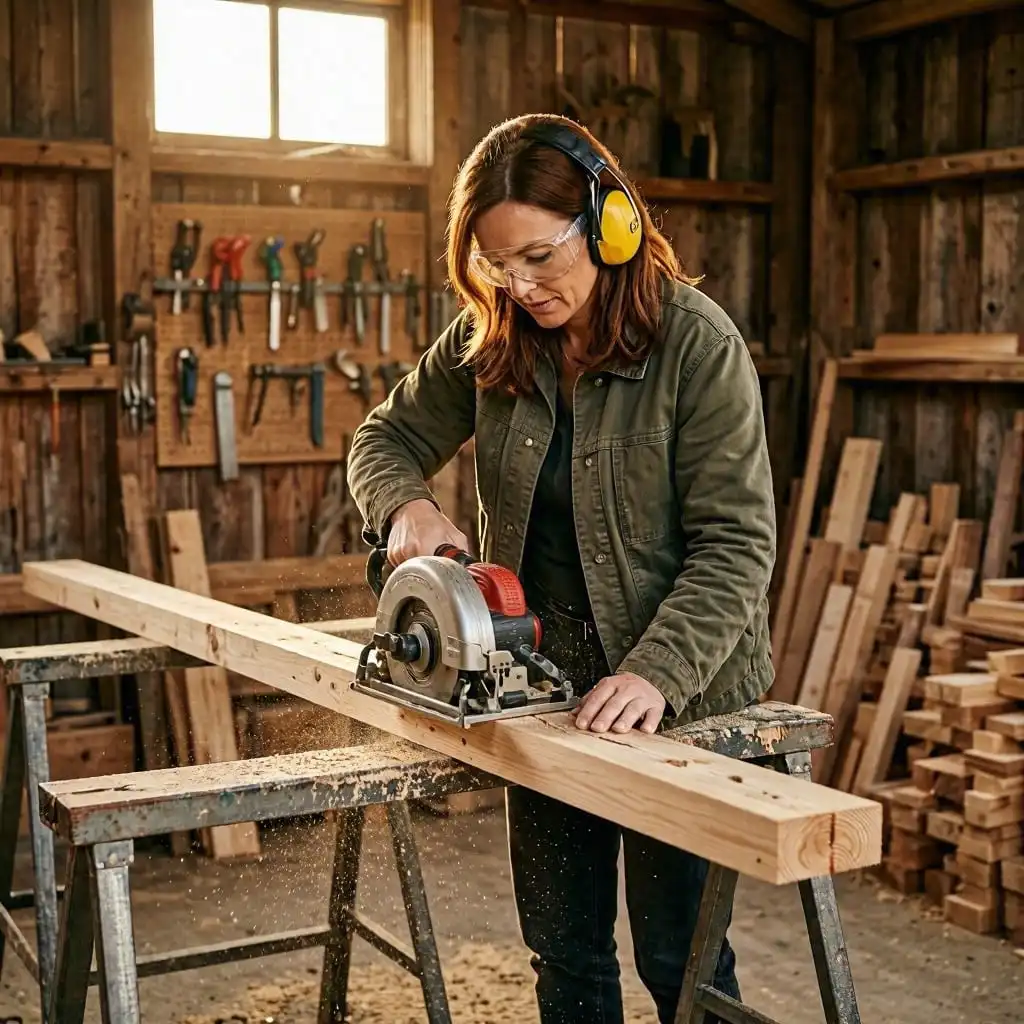
Yes, you can cut timber with a circular saw, and it is one of the most useful power tools for making straight cuts through timber for DIY projects.
A circular saw can cut a wide range of timber, from smaller pieces such as 2×1 and 2×2 timber through to larger construction timber, provided the material is within the saw’s cutting capacity.
Circular saws are particularly useful when you need to make straight crosscuts or long cuts through timber. With the right blade, good support and a suitable guide, they can produce accurate results without needing specialist woodworking equipment.
The main things to consider are the type and thickness of timber, the blade you’re using and the cutting depth of your saw.
Quick Answer
If you’re wondering can you cut timber with a circular saw, the answer is yes. For the best results:
- Choose a blade suitable for cutting timber
- Check the thickness of the timber against your saw’s cutting capacity
- Measure and mark the timber carefully
- Support the timber securely
- Set the correct cutting depth
- Use a straightedge or guide where appropriate
- Keep the saw moving steadily without forcing it
- Make sure the cutting area is clear before starting
- Follow the manufacturer’s instructions for your saw and blade
For most general DIY timber cutting, a 24–40 tooth blade can provide a useful balance between cutting speed and finish. A lower tooth count is often suitable for faster construction cuts, while a higher tooth count can produce a cleaner edge.
The important thing is to choose a blade and saw that match the timber you’re working with rather than simply choosing the largest or most powerful tool available.
What You Need Before Cutting Timber
Before cutting timber with a circular saw, it’s worth preparing your equipment and work area. For most DIY projects, you don’t need specialist equipment. A suitable circular saw, the right blade and good support will cover many common timber-cutting jobs.
Basic Equipment
You’ll generally need:
- A suitable circular saw
- A blade designed for cutting timber
- A tape measure
- A pencil or suitable marking tool
- A straightedge or guide where required
- Stable supports for the timber
- Suitable clamps where needed
- Eye and hearing protection
- Suitable dust control and respiratory protection where appropriate
Before fitting a blade, check that its diameter, bore size and maximum RPM are compatible with your circular saw.
The blade should also be suitable for the type of timber you’re cutting and in good condition.
For more information about choosing a blade, see my guide to the best circular saw blades for DIY UK.
Check the Timber
Before starting, look at the timber you’re planning to cut.
Check:
- The actual thickness and width of the timber
- Whether it is straight or twisted
- Whether it is treated or untreated
- Whether there are visible knots, screws, nails or other objects
- Whether the timber is suitable for the saw and blade you’re using
Don’t assume that timber sold under a particular nominal size has exactly those finished dimensions. Measure the actual piece before setting up your cut.
Prepare Your Work Area
Make sure the timber is properly supported and cannot move unexpectedly.
You should also have enough room to position the saw and complete the cut without the cable, battery, timber or offcut creating a problem.
Before switching on the saw, check the cutting path and make sure there are no cables, pipes, tools, clamps or other hazards where the blade could reach.
Good preparation makes the actual cutting process much easier and gives you a better chance of achieving a clean, accurate result.
Common Timber Sizes and Uses in the UK
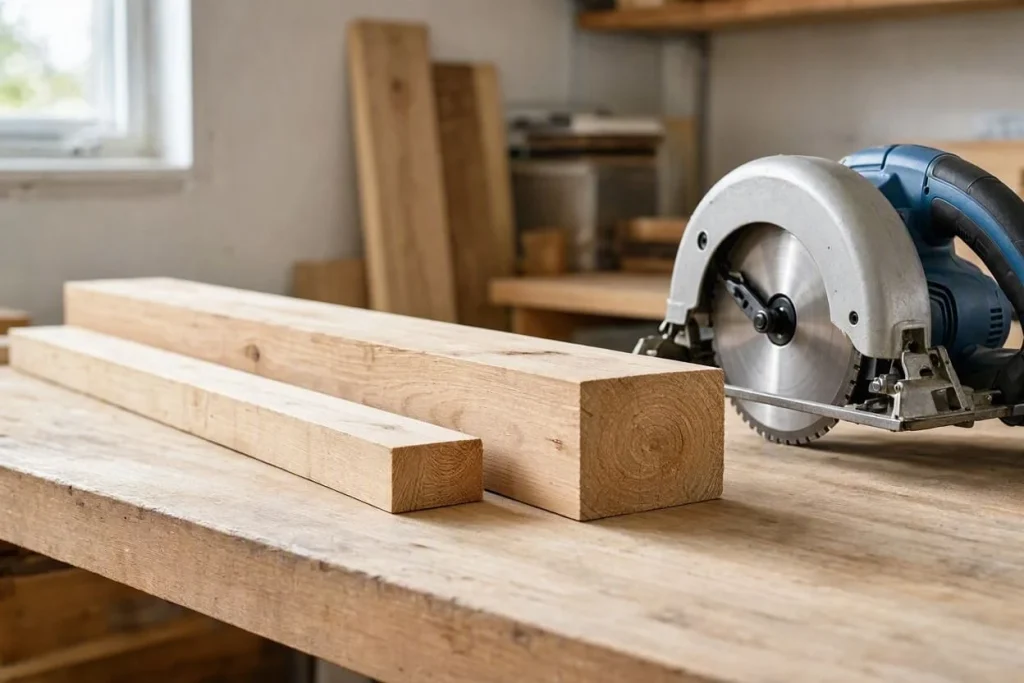
Timber is sold in many different sizes in the UK, and the dimensions you see on the label aren’t always the same as the timber’s actual finished size. Understanding the difference is useful when you’re deciding whether your circular saw has enough cutting capacity.
Common DIY Timber Sizes
You may commonly come across sizes such as:
| Nominal Timber Size | Approx. Finished Size* | Common DIY Uses |
|---|---|---|
| 2 × 1 | 19 × 44mm | Battens, framing and general DIY |
| 2 × 2 | 44 × 44mm | Small frames, supports and DIY projects |
| 3 × 2 | 44 × 69mm | Framing, supports and general construction |
| 4 × 2 | 44 × 94mm | Studwork, framing, shelving and heavier DIY |
| 6 × 2 | 44 × 144mm | Structural framing and larger construction projects |
| 8 × 2 | 44 × 194mm | Larger structural applications |
*Finished dimensions can vary depending on the type of timber and supplier, so always measure the actual piece you’re cutting.
Why Are the Finished Dimensions Smaller?
Timber is often sold using its nominal or original sawn dimensions, while the finished timber may have been planed or processed before you buy it.
For example, a piece sold as 4 × 2 timber may actually measure around 44 × 94mm rather than exactly 50 × 100mm.
This matters when using a circular saw because cutting capacity is based on the actual thickness of the material.
What Does PAR Timber Mean?
You may also come across the term PAR, which stands for Planed All Round. PAR timber has been machined or planed on all four sides to produce a smoother, more consistent finished piece of timber. This means its actual dimensions are normally smaller than the original sawn dimensions.
For example, timber originally sawn at around 50 × 100mm may be planed down to a smaller finished size, depending on the product and supplier.
PAR timber is commonly used for visible DIY projects, shelving, furniture, frames and other applications where a smoother, more finished surface is useful.
When using a circular saw, always measure the actual finished dimensions of the PAR timber rather than relying on the nominal size shown on the label.
This is particularly important when checking whether your circular saw has enough cutting depth for a particular piece.
What Is Timber Commonly Used For?
The type of timber you’ll encounter depends on the project.
Common DIY uses include:
- Battens for fixing, framing and supporting materials
- 2 × 2 and 3 × 2 timber for small frames and general construction
- 4 × 2 timber for studwork, framing and larger DIY projects
- Decking boards for outdoor projects
- Fence boards and posts for garden projects
- Planed timber for furniture, shelving and visible woodworking
- Treated timber for outdoor applications
A circular saw can be useful for cutting many of these materials, provided the timber is within the saw’s cutting capacity.
Check the Actual Dimensions Before Cutting
If you’re unsure whether your circular saw can cut a particular piece of timber in one pass, measure it first.
For example, a typical 165mm circular saw may have a maximum cutting depth of around 55–57mm at 90°, but the exact specification varies between models.
That means smaller timber such as 2 × 1 or 2 × 2 is comfortably within the cutting capacity of many saws, while larger timber may require you to check the manufacturer’s specification carefully.
For a more detailed explanation of cutting capacity, see our guide to [how deep a circular saw can cut].
Understanding the actual size of the timber you’re working with makes it much easier to choose the right saw and plan the cut properly.
What Circular Saw Blade Is Best for Timber?
Choosing the right blade makes a big difference when cutting timber with a circular saw. The best blade depends on whether you want fast cuts, cleaner cuts or a good balance between the two.
For most UK DIY projects, a general-purpose wood blade with around 24–40 teeth is a sensible starting point. As a simple guide:
| Blade tooth count | Best suited to | Type of cut |
|---|---|---|
| 18–24T | Construction timber and fast cuts | Faster, rougher cuts |
| 30–40T | General DIY timber | Good all-round balance |
| 40–60T | Planed timber and visible cuts | Cleaner, slower cuts |
24T Blades for Fast Timber Cuts
A blade with around 18–24 teeth is useful when speed is more important than having a perfectly clean finish.
These blades can work well for:
- Construction timber
- Studwork
- Framing
- Battens
- General building work
- Timber where the cut edge will not be highly visible
The larger gaps between the teeth help the blade remove material quickly, although the resulting cut can be rougher.
30–40T Blades for General DIY
For many DIY beginners, a 30–40 tooth wood blade is a good all-round choice.
It can provide a useful balance between:
- Cutting speed
- Cut quality
- Ease of use
- General versatility
This makes it suitable for common timber such as 2×1, 2×2, 3×2 and 4×2, provided the saw has enough cutting capacity for the actual timber dimensions.
40–60T Blades for Cleaner Cuts
If you’re cutting PAR timber, shelving, furniture components or other timber where the finished edge will be visible, a blade with around 40–60 teeth can produce a cleaner result.
The trade-off is that a higher-tooth-count blade generally cuts more slowly, so it isn’t always the best choice for rough construction work.
Check the Blade Is Compatible With Your Saw
Tooth count isn’t the only thing to check before buying a circular saw blade.
Make sure the replacement blade has the correct:
- Diameter for your saw
- Bore size
- Maximum RPM rating
- Material suitability
- Cutting direction
Always follow the saw and blade manufacturer’s compatibility requirements.
For more detail on choosing the right tooth count and blade type, see our guide to the best circular saw blades for DIY UK.
For most beginners cutting ordinary timber, a 30–40T general-purpose wood blade is a sensible starting point. If you’re mainly cutting rough construction timber, a lower-tooth-count blade can make faster cuts, while PAR timber and visible finished work may benefit from a higher-tooth-count blade.
How to Mark Timber for Cutting
Accurate marking is the first step towards making a clean, straight cut. Even with a good circular saw and blade, a poorly marked cut can leave you with timber that is the wrong length.
For most DIY projects, you only need a tape measure, pencil and straightedge.
Measure the Timber Carefully
Measure from a known end of the timber and mark the required length with a sharp pencil. For example, if you need a piece of timber 600mm long, measure 600mm from the end and make a clear mark.
It is worth checking the measurement twice before cutting. Once the timber has been cut, you cannot put the material back.
Use the Circular Saw’s Cut-Line Indicator
Many circular saws have a small arrow, notch, groove or other marking on the shoe that indicates the path of the blade.
This is designed to help you line the saw up with your pencil mark before and during the cut.
Some saws have separate indicators for different cutting positions, such as 90° and 45° bevel cuts.
The exact design varies between manufacturers, so check the markings on your particular saw and make sure they correspond with the blade position.
For a beginner, this can be a very useful feature because you can use the indicator to help keep the saw following your marked line.
What About Laser Guides?
Some circular saws are fitted with a laser guide that projects a visible line onto the timber. The laser can help you see the intended cutting path, particularly when making longer cuts.
However, a laser is not essential for accurate cutting. A clearly marked line and the saw’s own cut-line indicator can be perfectly adequate for many DIY projects.
If your saw has a laser, make sure you understand how its line relates to the blade before relying on it for accurate cuts. Follow the manufacturer’s instructions and check the alignment if necessary.
Draw a Clear Cutting Line
Use a straightedge or combination square to draw a straight line across the timber.
Make the line easy to see, particularly if you’re working with darker timber or a busy surface.
For wider timber, make sure the line continues clearly across the full width of the piece so you can follow it during the cut.
Remember the Blade’s Kerf
The kerf is the width of material removed by the saw blade.
This means the blade does not simply cut along an invisible pencil line without removing any material.
If the final length needs to be particularly accurate, take the blade’s kerf into account when positioning the cut.
For general DIY work, the important point is simply to make sure you’re cutting on the correct side of your marked line.
Mark the Waste Side
A simple technique is to put an X on the section of timber that will become waste.
This makes it much easier to see which side of the line the saw should cut.
It can be especially useful when making several cuts or when working with multiple pieces of timber.
Check the Measurement Before Cutting
Before starting the saw, check:
- The required finished length
- The position of your cutting line
- Which side of the line is waste
- That the saw’s cut-line indicator is aligned correctly
- The actual timber dimensions
- That the timber is supported correctly
- That the cutting path is clear
Taking an extra few seconds to check the mark can save you from wasting a piece of timber.
For beginners, measure twice, mark clearly and check the saw’s cut-line indicator before cutting is one of the simplest ways to improve accuracy.
How to Support Timber Before Cutting
Properly supporting the timber is important for both safety and cutting accuracy. Timber that moves, bends or closes onto the blade can make a cut much more difficult to control.
Support the Timber Securely
Place the timber on a stable work surface, workbench or suitable supports so it cannot move around while you’re cutting. For longer pieces, use additional supports where needed to prevent the timber from sagging.
The aim is to keep the timber stable while also leaving the area underneath the cutting line clear.
Keep the Cut Area Clear
Make sure the saw blade has enough clearance beneath the timber. You don’t want the blade contacting your workbench, support, floor or anything else underneath the material.
Before cutting, check what is beneath and around the timber for:
- Cables
- Pipes
- Screws or nails
- Tools
- Clamps
- Other objects
This is particularly important when cutting timber that is already installed or fixed in place.
Use Clamps When Appropriate
Clamps can help prevent timber from moving while you cut. If you use them, position them so they do not interfere with the saw’s movement or cutting path.
For longer timber, having the material properly supported at several points can make a noticeable difference to control and accuracy.
Avoid Unsupported Offcuts
Think about what will happen to the section of timber that you’re cutting away. If a long offcut is left unsupported, it can move or fall as the cut is completed.
Support the material in a way that keeps the main piece stable while allowing the offcut to separate naturally.
Supporting Larger Timber
Larger pieces of timber can be heavy and awkward to handle. If you’re cutting long or heavy timber, make sure it is properly supported before starting and consider getting assistance when needed.
Don’t try to control a large piece of timber while simultaneously trying to concentrate on operating the saw.
Good support makes the cut easier to control and can also help produce a cleaner, more accurate result.
For beginners, the simple rule is: support the timber securely, keep the blade path clear and make sure the material cannot move unexpectedly during the cut.
How to Set the Correct Cutting Depth
Before cutting timber, it’s important to check that your circular saw has enough cutting capacity for the material you’re working with. The blade diameter gives you a general indication of cutting capacity, but the actual maximum cutting depth varies between saws.
Measure the Timber First
Start by measuring the actual thickness of the timber you want to cut. This is particularly important with UK timber because the size printed on the label may not be the same as the finished dimensions.
For example, a piece of timber sold as 4 × 2 may have finished dimensions of approximately 44 × 94mm, depending on how it has been processed.
Check Your Saw’s Maximum Cutting Depth
Look at the manufacturer’s specifications for your particular circular saw.
As a general guide, many:
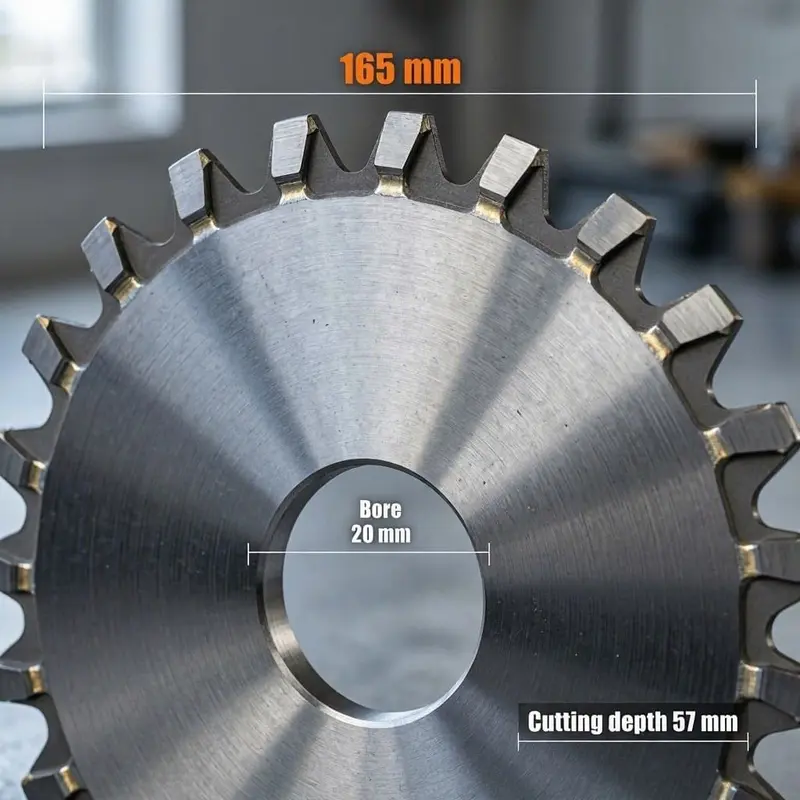
- 165mm circular saws provide around 55–57mm of cutting depth at 90°
- 184mm circular saws provide around 60–65mm
- 185mm circular saws provide around 60–65mm
These are typical ranges rather than universal specifications. Always check your own saw’s instructions or manufacturer’s specifications.
For example, a 165mm saw with a maximum cutting depth of 57mm has enough capacity for timber that is 44mm thick, but not necessarily timber that is 94mm thick.
Set the Depth Correctly
If your saw has an adjustable depth setting, adjust it according to the manufacturer’s instructions and the material you’re cutting.
You don’t need to assume that the blade should simply be set to its maximum depth for every cut.
The correct setting depends on the material, the saw and the type of cut you’re making.
Check the Blade Has Enough Capacity
Before starting the cut, make sure the saw’s specified cutting depth is suitable for the actual thickness of the timber. If the timber is thicker than the saw’s maximum cutting capacity, don’t try to force the saw through it.
Instead, consider whether a different saw or cutting method would be more appropriate for the job.
For more information about cutting depths and different circular saw sizes, see our guide to [how deep a circular saw can cut].
For beginners, the key point is simple: measure the timber, check your saw’s actual cutting depth and make sure the saw is suitable for the material before you start cutting.
How to Cut Timber Straight With a Circular Saw
A circular saw is particularly useful for making straight cuts in timber. With a clearly marked line, good support and a steady technique, even beginners can achieve accurate results.
Use the Saw’s Cut-Line Indicator
Start by positioning the saw so the cut-line indicator on the shoe lines up with your marked cutting line. If your saw has a laser guide, you can also use the laser to help follow the intended cutting path.
Before starting the cut, make sure you are comfortable with the saw’s position and that the timber is securely supported.
Use a Straightedge for Longer or More Accurate Cuts
For a short piece of timber, you may be able to follow the marked line using the saw’s own indicator.
For longer cuts or when greater accuracy is important, a straightedge, guide rail or suitable saw guide can make it much easier to maintain a consistent cutting path.
Secure the guide so it cannot move while cutting and position it according to the instructions for your particular saw or guide system.
Start the Cut Correctly
Position the saw at the beginning of the marked line with the blade clear of the timber. Make sure the blade is at the appropriate depth and that the saw is positioned securely before starting.
Allow the saw to reach its normal operating speed before moving into the timber, following the manufacturer’s instructions for your particular model.
Keep the Saw Moving Steadily
Once the cut has started, guide the saw along the marked line at a steady, controlled pace. Avoid forcing the saw through the timber. If the saw begins to struggle, slows noticeably or behaves unexpectedly, stop and investigate rather than trying to push harder.
Keep both hands in the positions recommended by the manufacturer and keep them away from the blade and its path.
Finish the Cut Carefully
As you approach the end of the timber, continue to maintain control of the saw. Don’t rush the final part of the cut simply because you’re nearly finished.
Once the blade has cleared the timber, follow the manufacturer’s instructions for switching off and wait for the blade to stop before moving or setting down the saw.
For Beginners, Keep It Simple
The basic process is:
- Measure and mark the timber
- Support it securely
- Check the cutting depth
- Align the saw’s indicator with your cutting line
- Use a guide for longer or more accurate cuts
- Make the cut steadily without forcing the saw
- Finish the cut while maintaining control
With practice, you’ll become more comfortable using the saw’s cut-line indicator and judging how quickly the saw should move through different types of timber.
How to Cut 2×4 Timber With a Circular Saw
Yes, a circular saw can cut 2×4 timber, and it is one of the most common sizes you’ll encounter in DIY and construction projects. However, it’s important to remember that the size printed on timber is not always its actual finished size.
What Size Is 2×4 Timber in the UK?
In the UK, timber sold as 2 × 4 may have finished dimensions of approximately 44 × 94mm, depending on the type of timber and how it has been processed. Always measure the actual piece before cutting rather than relying solely on the nominal size.
Can a 165mm Circular Saw Cut 2×4?
It depends on which dimension you’re cutting across. Many 165mm circular saws have a maximum cutting depth of around 55–57mm at 90°.
That means a 165mm saw can generally cut through the 44mm dimension of typical 2×4 timber in one pass.
However, the 94mm dimension is greater than the typical cutting depth of a 165mm saw, so you should not assume that a 165mm circular saw can cut completely through it in one pass when cutting across the wider face.
What About a 184mm or 185mm Circular Saw?
Larger circular saws often provide around 60–65mm of cutting depth at 90°, depending on the model.
This gives you more cutting capacity, but even 60–65mm is still less than the approximately 94mm width of typical finished 2×4 timber.
So a larger saw does not automatically mean you can cut completely through a 2×4 in every orientation.
Check the Direction of the Cut
The orientation of the timber makes a big difference.
A 2×4 piece is approximately:
- 44mm on one dimension
- 94mm on the other
If the dimension you’re cutting through is less than your saw’s available cutting depth, the saw may be able to complete the cut in one pass.
If it is greater than the saw’s cutting capacity, you will need to consider whether a different cutting method or tool is more appropriate.
Check Your Saw’s Specification
Circular saws vary, even when they use the same blade diameter.
Before cutting 2×4 timber, check your particular saw’s:
- Maximum cutting depth at 90°
- Maximum cutting depth at 45°
- Blade diameter
- Manufacturer’s instructions
For more information, see my guide to what size circular saw you need for DIY in the UK and my guide to how deep a circular saw can cut.
Don’t Assume Bigger Is Always Better
If most of your DIY involves smaller timber, a 165mm circular saw may be perfectly adequate. If you regularly work with larger timber, a saw with greater cutting capacity can give you more flexibility.
The important thing is to choose a saw that matches the actual dimensions of the timber you expect to cut, rather than simply buying the biggest model available.
How to Cut Thick Timber With a Circular Saw
Circular saws are excellent for many timber projects, but there is a point where the material becomes too thick for the saw’s available cutting depth.
The important thing is to check the actual thickness of the timber against your saw’s maximum cutting depth rather than assuming a larger blade will always be enough.
Check the Timber Dimensions
Start by measuring the timber you’re planning to cut. This is particularly important with larger construction timber because the nominal size may differ from the actual finished dimensions.
For example, a piece sold as 6 × 2 may have finished dimensions of approximately 44 × 144mm.
A typical 165mm circular saw with around 55–57mm of cutting depth clearly cannot cut through 144mm of timber in one pass.
Even a larger 184mm or 185mm saw with around 60–65mm of cutting depth would not normally have enough capacity to cut through material of that thickness in one pass.
What If the Timber Is Too Thick?
If the timber is thicker than your saw’s maximum cutting depth, don’t try to force the saw through it.
A different cutting method or a tool with greater cutting capacity may be more appropriate, depending on the job.
For particularly large or heavy timber, also consider how the material will be supported and handled before deciding how to make the cut.
What Other Tool Can Cut Thick Timber?
If your circular saw doesn’t have enough cutting depth, there are several other options depending on the type of cut and the finish you need.
A reciprocating saw can be useful for cutting thicker timber, particularly for rough construction work, renovation projects and awkward cuts where a circular saw is difficult to position. The trade-off is that the cut is generally less precise and less clean than a circular saw.
A mitre saw can be a better choice when you need accurate crosscuts and the timber is within the saw’s cutting capacity. However, the maximum thickness it can cut depends on the particular model.
A hand saw can also be perfectly practical for occasional cuts if you don’t want to buy another power tool.
For smaller or more detailed cuts, a jigsaw may be useful, although it isn’t normally the first choice for cutting very thick timber.
If you regularly work with thick timber, another option is simply to use a larger circular saw with greater cutting capacity.
If you’re interested in reciprocating saws, see my guide to what a reciprocating saw is used for for more information.
Larger Circular Saws Offer More Capacity
Moving from a 165mm saw to a larger 184mm or 185mm model can provide additional cutting depth.
As a general guide:
| Circular saw size | Typical depth at 90° |
|---|---|
| 165mm | Around 55–57mm |
| 184mm | Around 60–65mm |
| 185mm | Around 60–65mm |
These figures are typical ranges rather than universal specifications. Always check the manufacturer’s stated cutting depth for your particular saw.
Think About the Type of Timber
Thick timber can also be heavier and more awkward to handle.
This matters when working with:
- Large construction timber
- Posts
- Heavy framing timber
- Large garden projects
- Structural timber
Make sure the material is properly supported and that you have enough room to work safely.
Choose the Saw for Your Typical Projects
If you regularly work with thicker timber, the additional cutting capacity of a larger circular saw may be worthwhile.
However, if most of your DIY involves shelving, flooring, sheet materials, battens and smaller construction timber, a 165mm saw may provide all the capacity you need.
The best circular saw is therefore not necessarily the one with the biggest blade. Choose enough cutting capacity for the materials you actually expect to work with.
How to Make Repeated Timber Cuts
If you’re cutting several pieces of timber to the same length, measuring and marking every piece individually can become time-consuming. A consistent setup can make repeated cuts quicker and more accurate.
Measure the First Piece Carefully
Start by measuring and marking the first piece of timber accurately. Double-check the measurement before making the first cut. This first piece can then be used to check that your setup is producing the required length.
Use a Consistent Reference Point
When cutting multiple pieces, try to measure each piece from the same reference end.
This reduces the chance of small measurement differences building up between pieces.
For example, if you’re cutting several lengths of timber to 600mm, use the same end of each piece as your starting point.
Use a Guide or Stop
For repeated cuts, a suitable straightedge, guide or stop system can help keep the measurements consistent. The exact setup will depend on the type of work you’re doing and the equipment you have available.
Make sure any guide or stop is securely positioned and cannot interfere with the saw or blade.
Check the First Few Cuts
Don’t assume that getting the first measurement right means every subsequent piece will automatically be correct.
Check the first few cuts against your required measurement before continuing with a larger batch.
This gives you a chance to correct the setup before cutting more timber.
Keep the Setup Consistent
Once you’ve established an accurate setup, avoid moving the guide, stop or reference point unnecessarily.
Keep the timber positioned in the same way for each cut and maintain the same approach throughout the job.
Accuracy Matters More Than Speed
When making repeated cuts, it can be tempting to rush because the process becomes repetitive.
However, a few extra seconds spent checking each piece can save considerable time if you discover that several pieces have been cut incorrectly.
For beginners, the simplest approach is measure carefully, make one accurate cut, check it, then use a consistent setup for the remaining pieces.
Common Mistakes When Cutting Timber
A circular saw can make cutting timber much easier, but beginners can run into problems if the setup or technique isn’t right. Here are some of the most common mistakes to avoid.
Using the Wrong Blade
A blade designed for the wrong material or type of cut can produce poor results.
For general timber cutting, use a suitable wood-cutting blade and make sure the diameter, bore and maximum RPM are compatible with your saw.
Poorly Supporting the Timber
Timber that moves, bends or becomes unstable during a cut can make the saw harder to control. Make sure the material is properly supported and that the cut area remains clear.
Cutting Without a Clear Guide or Mark
Trying to cut without a clearly marked line makes it much harder to achieve an accurate result. For longer or particularly accurate cuts, a suitable straightedge or guide can make following the intended cutting path easier.
Setting the Wrong Cutting Depth
The saw needs enough cutting capacity for the actual thickness of the timber. Check the manufacturer’s specified cutting depth rather than assuming that the blade diameter tells you everything you need to know.
Forcing the Saw
If the saw starts to struggle, don’t simply push harder. Forcing the saw can make the cut more difficult to control and may indicate that the blade, cutting depth, material or saw is not suitable for the job.
Stop and check what is happening before continuing.
Ignoring the Timber’s Condition
Timber isn’t always perfectly straight or free from defects.
Look for:
- Knots
- Splits
- Warping
- Twisting
- Nails
- Screws
- Other embedded objects
Take extra care with reclaimed or previously used timber because it may contain hidden metal fixings.
Cutting Too Quickly
Trying to rush through a cut can reduce accuracy and make the saw harder to control.
A steady, controlled approach is generally more useful than trying to complete the cut as quickly as possible.
Forgetting About the Offcut
Think about what will happen to the piece of timber being removed.
An unsupported offcut can move or fall as the cut is completed, so make sure the timber is arranged appropriately before starting.
Not Checking the Cut Before Repeating It
If you’re cutting several pieces to the same length, check the first cut carefully before continuing.
A small measurement error repeated across several pieces can leave you with a pile of incorrectly sized timber.
Rushing the End of the Cut
The final part of a cut still requires control.
Don’t relax your attention simply because you’re nearly finished. Maintain control until the blade has cleared the timber and follow the manufacturer’s instructions for stopping the saw.
For beginners, most cutting problems can be avoided by using the correct blade, supporting the timber properly, checking the cutting depth and taking your time.
You may also want to read the HSE information on using work equipment safely.
Tips for Getting Cleaner Timber Cuts
A circular saw can produce very clean cuts in timber when the blade, saw and setup are suitable for the job.
You don’t necessarily need expensive equipment to improve the finish. A few simple techniques can make a noticeable difference.
Use the Right Blade
Choose a blade designed for cutting wood and select the tooth count according to the type of cut you’re making.
As a general guide:
- 18–24T — faster cuts in construction timber
- 30–40T — good all-round choice for general DIY
- 40–60T — cleaner cuts in planed timber and visible work
Make sure the blade is compatible with your particular saw.
Make Sure the Blade Is Sharp
A sharp, suitable blade will generally produce a better cut than a blade that is worn or damaged.
If you notice the saw struggling, the cut becoming unusually rough or the timber showing excessive burning or marking, check the condition and suitability of the blade.
Support the Timber Properly
Good support helps prevent the timber from moving or flexing while you’re cutting.
This is particularly important with longer pieces, where movement can affect both accuracy and cut quality.
Use a Guide for Long Cuts
For longer or particularly accurate cuts, a straightedge, guide rail or suitable saw guide can help you maintain a consistent cutting path.
The saw’s own cut-line indicator can be useful for shorter cuts, but a physical guide can make longer cuts easier to control.
Don’t Rush the Cut
Allow the saw to cut at a steady, controlled pace.
Trying to force the saw through the timber can result in a rougher cut and make the saw more difficult to control.
Consider Which Side of the Timber Will Be Visible
If the finished appearance matters, think about which face of the timber will be visible in the finished project.
Different circular saws and blades can produce different levels of splintering on either side of the cut.
For particularly visible work, make a test cut on a scrap piece of timber first.
Check Your Setup Before Cutting
Before making an important cut, check:
- The blade is suitable and in good condition
- The timber is securely supported
- The cutting depth is appropriate
- Your cutting line is clearly marked
- The saw’s cut-line indicator is aligned
- Any guide is securely positioned
- The cutting path is clear
Taking a little extra time with the setup can make a significant difference to the finished result.
For beginners, a suitable blade, good support and a steady cutting pace are often more important than buying expensive accessories.
Frequently Asked Questions
Can you cut timber with a circular saw?
Yes. Circular saws are very useful for cutting timber and are particularly good for making straight cuts. The important factors are using a suitable blade, supporting the timber properly and making sure the saw has enough cutting depth for the material.
What size circular saw is best for cutting timber?
For many DIY projects, a 165mm circular saw provides a good balance of cutting capacity, weight and ease of handling.
Larger 184mm or 185mm saws can provide greater cutting depth and may be more suitable if you regularly work with thicker timber.
Can a 165mm circular saw cut 2×4 timber?
It depends on the orientation of the timber.
Typical finished 2×4 timber may measure around 44 × 94mm. Many 165mm saws can cut through the 44mm dimension in one pass, but their typical 55–57mm cutting depth is not enough to cut through the full 94mm dimension.
Always check the actual dimensions of your timber and the cutting depth of your particular saw.
What blade should I use for cutting timber?
For general DIY timber cutting, a 30–40 tooth wood-cutting blade is a sensible all-round choice.
A lower-tooth-count blade, such as 18–24T, can be useful for faster cuts in construction timber, while a higher-tooth-count blade can produce cleaner cuts in planed timber and visible work.
Can a circular saw cut thick timber?
Yes, provided the timber is within the saw’s cutting capacity.
For thicker timber, check the actual thickness against the manufacturer’s stated maximum cutting depth. If the timber is substantially thicker than the saw can cut, a larger saw or another suitable cutting method may be more appropriate.
What is PAR timber?
PAR stands for Planed All Round.
PAR timber has been machined or planed on all four sides to produce a smoother and more consistent finished piece. Its actual dimensions are normally smaller than the original sawn dimensions.
PAR timber is commonly used for shelving, furniture, frames and other DIY projects where a smoother finished surface is useful.
Do circular saws have laser guides?
Some circular saws have a laser guide that projects a line onto the timber to help indicate the cutting path.
However, not every circular saw has one. Many saws instead use a cut-line indicator built into the shoe.
A laser is useful but isn’t essential for making accurate cuts.
Can I cut reclaimed timber with a circular saw?
Yes, but take extra care with reclaimed timber.
Old timber may contain hidden nails, screws or other metal objects, so inspect it carefully before cutting. A suitable blade and appropriate precautions are important.
How do I get a clean cut in timber?
Use a suitable sharp blade, support the timber properly, mark the cut accurately and guide the saw steadily.
For visible work, a higher-tooth-count blade may provide a cleaner finish. Making a test cut on scrap timber can also help you check the result before cutting your finished piece.
Is a circular saw better than a reciprocating saw for timber?
For straight, accurate cuts, a circular saw is generally the better choice.
A reciprocating saw is more useful for rough cuts, demolition, renovation work and situations where access is difficult.
The best tool depends on the type of cut and the finish you need.
Final Verdict
So, can you cut timber with a circular saw?
Absolutely. A circular saw is one of the most useful power tools for cutting timber, particularly when you need to make straight, accurate cuts.
For most UK DIY beginners, a 165mm circular saw is a very capable all-round option. It can handle common materials such as battens, shelving, floorboards, sheet materials and many everyday timber sizes.
If you regularly work with thicker timber, larger 184mm or 185mm circular saws can provide additional cutting capacity.
The key is not simply choosing the largest saw. Instead, consider:
- The actual dimensions of the timber you normally cut
- The saw’s maximum cutting depth
- The type of blade you need
- Whether you need fast or cleaner cuts
- How easy the saw is to handle
- Whether your projects require a corded or cordless saw
For general DIY timber cutting, a 30–40 tooth wood blade is a sensible starting point, while lower-tooth-count blades can be useful for faster construction cuts and higher-tooth-count blades can produce cleaner results on visible timber.
Always support the timber securely, check the cutting depth, use a suitable blade and follow the manufacturer’s instructions for your particular saw.
If you’re new to circular saws, taking a little extra time to measure, mark and set up each cut properly will usually make a much bigger difference than simply buying a more powerful saw.
In short: a circular saw is an excellent choice for cutting timber, and for most DIY beginners, a good 165mm model provides plenty of capability for everyday projects.