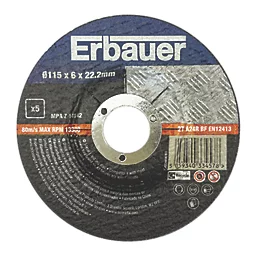
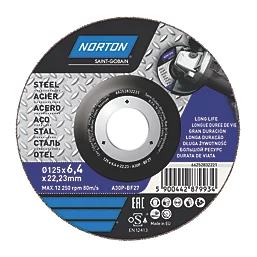
Can you use 115mm discs on a 125mm angle grinder? In many cases, a 115mm disc can be used on a 125mm angle grinder, but you should not assume that every 115mm disc is automatically suitable for every 125mm grinder.
When shopping at Screwfix or Toolstation, you will notice that small angle grinders typically come in two standard sizes: 115mm (4.5-inch) and 125mm (5-inch). If you have recently upgraded from a 115mm model to a more powerful 125mm machine, you might find yourself with a drawer full of leftover 115mm slitting and grinding discs.
The important things to check are the grinder manufacturer’s instructions, the disc diameter, the centre bore, the disc’s maximum permitted speed and whether the disc can be used with the grinder’s guard and mounting system.
Using a smaller disc can also reduce the available cutting depth, so there may be situations where using the correct 125mm disc is more practical.
The short answer is yes, you can absolutely use 115mm discs on a 125mm angle grinder.
Because both sizes share the identical European standard 22.23mm (7/8 inch) centre bore, a 115mm disc will slot perfectly onto a 125mm grinder’s backing flange. However, while it is physically possible and entirely safe if done correctly, there are a few practical trade-offs and safety golden rules you need to know.
Why Use a 115mm Disc on a 125mm Grinder?
The main reason for using a 115mm disc on a 125mm grinder is simple: you may already have the discs available.
Many common 115mm and 125mm angle-grinder discs use a 22.23mm centre bore, but this should always be checked on the particular disc rather than assumed.
A smaller disc can be physically compatible with some 125mm grinders, but compatibility is not determined by diameter and bore alone.
Before fitting the disc, check:
- The grinder manufacturer’s permitted disc sizes
- The disc diameter
- The centre bore
- The disc’s maximum operating speed
- The type of disc and its intended material
- The grinder’s guard and mounting arrangement
If the manufacturer does not state that the smaller disc is permitted, don’t assume that it is simply because the disc fits the spindle.
What Happens When You Use a 115mm Disc?
The main practical difference is cutting depth.
A 115mm disc has a smaller overall diameter than a 125mm disc, so it cannot reach as far into the workpiece.
This may not matter when you’re:
- Cleaning up welds
- Removing surface rust
- Grinding small areas
- Cutting thin sheet metal
- Making shallow cuts
However, the difference becomes more noticeable when cutting thicker material.
If you regularly need the maximum cutting depth available from your 125mm grinder, using the correct 125mm disc will generally make more sense.
Does the Grinder Become Less Powerful?
No. Fitting a smaller compatible disc does not automatically make the motor less powerful.
However, the usable cutting depth is reduced, and the smaller disc may not be the most efficient choice for a job where a 125mm disc is intended.
The grinder should still be operated according to its manufacturer’s instructions and within the limits of the disc being used.
Can You Put a 125mm Disc on a 115mm Grinder?
You should not fit a larger disc to a grinder unless the manufacturer specifically states that the grinder is designed for that disc size.
The maximum permitted disc diameter is part of the grinder’s specification.
Never remove or modify the grinder’s guard simply to make a larger disc fit.
The guard is an important part of the tool’s safety system and is designed for the accessories and applications specified by the manufacturer.
There can also be differences in the maximum spindle speed between grinders, so you must not assume that a disc suitable for one grinder is suitable for another simply because the centre bore fits.
Check the Disc’s Maximum Speed
One of the most important checks is the maximum operating speed marked on the disc.
Angle grinders can operate at high rotational speeds, and the disc must be rated for the speed of the grinder.
Before fitting a disc:
- Check the maximum no-load speed of your grinder.
- Check the maximum permitted speed marked on the disc.
- Make sure the disc is suitable for the grinder and application.
- Never use a disc with a lower speed rating than the grinder’s permitted operating speed.
- Replace any disc that is cracked, damaged or otherwise unsuitable.
Don’t rely on a generic RPM figure for all 115mm or 125mm grinders. The actual speed varies between models.
Check the Disc Bore and Mounting System
Many standard angle-grinder discs use a 22.23mm centre bore, but there are exceptions and different mounting systems are available.
The disc must fit the grinder’s spindle and flange correctly.
Do not enlarge the bore, use improvised spacers or modify the disc to make it fit.
The disc should sit correctly on the mounting flange without excessive movement, and the locking system should be fitted according to the grinder and disc manufacturer’s instructions.
If your grinder uses a manufacturer-specific accessory system, such as Bosch X-LOCK, use compatible discs rather than trying to adapt a conventional disc to the tool.
How to Fit a 115mm Disc to a 125mm Grinder
If your grinder’s instructions specifically permit the use of the smaller disc, follow the manufacturer’s fitting procedure.
1. Isolate the Power
Unplug a corded grinder or remove the battery from a cordless model before changing the disc.
Never rely on the trigger being switched off as your only precaution.
2. Check the Disc
Inspect the disc for cracks, chips, distortion or other damage.
Check its diameter, bore, maximum speed and material rating.
3. Check the Guard
Make sure the correct guard is fitted securely and positioned as specified by the grinder manufacturer.
Do not remove the guard to accommodate a different disc size.
4. Fit the Disc Correctly
Place the disc onto the spindle and flange according to the manufacturer’s instructions.
The disc should sit correctly and securely without forcing it into position.
5. Fit the Locking System
Install the correct locking nut or accessory mounting system and tighten it according to the manufacturer’s instructions.
Do not over-tighten the locking system.
6. Check Everything Before Starting
Before switching on the grinder, make sure:
- The disc is correctly fitted.
- The guard is secure.
- The disc is undamaged.
- The disc is rated for the grinder’s speed.
- The work area is clear.
- You are wearing the appropriate PPE.
If anything doesn’t look right, don’t use the grinder until you’ve identified the problem. It’s also worth reading the HSE guidance on grinding safely.
115mm vs 125mm Discs: Quick Comparison
| Feature | 115mm disc | 125mm disc |
|---|---|---|
| Overall diameter | Smaller | Larger |
| Maximum cutting depth | Lower | Higher |
| Suitable for a 125mm grinder | Only where permitted by the manufacturer | Normally the intended size for a 125mm model |
| Centre bore | Often 22.23mm, but check the disc | Often 22.23mm, but check the disc |
| Surface grinding | Suitable for many applications | Suitable for many applications |
| Deep cutting | More limited | Greater cutting capacity |
| Existing 115mm discs | May be usable if compatible | Not applicable |
So, Can You Use 115mm Discs on a 125mm Angle Grinder?
In some cases, yes. A 115mm disc can be suitable for use on a 125mm angle grinder when the grinder manufacturer permits that disc size and the disc’s speed, bore, mounting system and application are all compatible.
The main disadvantage is reduced cutting depth compared with a 125mm disc.
If you’re unsure, check the instruction manual for your particular grinder rather than relying on the fact that the disc fits the spindle.
For more information about choosing and using angle-grinder accessories, see our guides on Angle Grinder Discs Explained, How to Change an Angle Grinder Disc and How to Use an Angle Grinder Safely.