
A circular saw can make cutting timber and sheet materials much quicker, but like any power tool, it needs to be used carefully.
For beginners, the most important thing is not simply learning how to make a cut. You also need to know how to set up the saw, secure the material, position yourself correctly and finish the cut safely.
Before using a circular saw, make sure you understand the controls and check that the blade is correctly fitted and suitable for the material you’re cutting.
You’ll also need to think about your working area. Keep the material properly supported, remove anything that could get in the way and make sure the saw’s power cable or battery isn’t going to create a hazard.
In this guide, I will take you through how to use a circular saw safely, step by step. I will also cover basic safety equipment, preparing the workpiece, making straight and bevel cuts, common beginner mistakes and when you should stop cutting.
If you’re new to circular saws, don’t worry about trying to work quickly. A controlled, deliberate cut is far more important than speed.
Take your time, follow the manufacturer’s instructions for your particular saw and make safety part of every cut you make.
What You Need Before You Start
Before making your first cut, take a few minutes to make sure you have the right saw, blade, workpiece and safety equipment ready. You don’t need a workshop full of specialist equipment, but a little preparation can make circular saw work much safer and easier.
Your circular saw
Make sure you’re familiar with the basic controls on your particular saw.
You should know how to:
- Start and stop the saw
- Operate the safety switch or trigger
- Adjust the cutting depth
- Adjust the bevel angle
- Check the blade
- Remove and fit the battery or connect the power supply safely
If you’re unfamiliar with the saw, read the manufacturer’s instructions before using it.
The correct blade
Make sure the blade is:
- The correct diameter for your saw
- The correct bore size
- Suitable for the material you’re cutting
- In good condition
- Properly fitted and tightened
A damaged or unsuitable blade should not be used. If you’re unsure which blade is appropriate, my guide to the best circular saw blades for DIY UK explains tooth counts and blade types in more detail.
A suitable work surface
You need to support the material properly while cutting. A pair of sturdy sawhorses or a suitable workbench can make this much easier.
The important thing is that the material is supported without the blade accidentally cutting into something underneath.
For sheet materials, make sure there is enough support to prevent the material from sagging or moving as you cut.
Personal protective equipment

At a minimum, consider suitable eye protection and hearing protection when using a circular saw.
Depending on the material and working environment, additional protection such as suitable respiratory protection may also be appropriate.
Dust can be particularly significant when cutting materials such as MDF, so don’t assume that working outdoors automatically removes the need for appropriate dust control.
A way to guide the saw
For straight, accurate cuts, you may want to use a straightedge, guide rail or suitable circular saw guide.
This isn’t essential for every job, but it can make it much easier for beginners to keep the saw travelling along the intended cutting line.
A clear working area
Before switching the saw on, check the area around you. Remove loose materials, tools and other objects that could interfere with the cut. Make sure you have enough room to move the saw through the entire cut without having to twist or stretch.
The best time to solve a potential problem is before the blade starts turning.
Take a moment to check everything before you begin.
Circular Saw Safety Equipment
You don’t need a huge amount of safety equipment to use a circular saw, but the right protection can reduce the risk from flying debris, noise and dust.
Eye protection
Safety glasses or suitable eye protection are one of the most important things to wear. A circular saw can produce small chips and particles as it cuts, particularly when working with timber and sheet materials.
Make sure your eye protection is suitable for the type of work you’re doing and fits securely.
Hearing protection
Circular saws can be loud, particularly when used for extended periods. Ear defenders or suitable ear protection can help reduce your exposure to high noise levels.
This is especially worth considering if you’re working in a small workshop or using the saw frequently.
Respiratory protection and dust control
Cutting materials such as MDF, plywood and other boards can produce dust. Good dust control is preferable to simply relying on a mask. Where appropriate, use a suitable extraction system or connect the saw to compatible dust extraction equipment.
If respiratory protection is required, make sure it is appropriate for the particular dust and is correctly fitted.
Suitable clothing
Wear practical clothing that won’t interfere with the saw or get caught on moving parts. Avoid loose sleeves, dangling cords, jewellery or anything else that could come into contact with the saw.
Never wear gloves simply because you’re using a power tool. Whether gloves are appropriate depends on the task and the manufacturer’s guidance. They should never reduce your ability to safely control the saw.
Safety footwear
For workshop or building work, suitable footwear can provide useful protection from dropped materials and tools. Sturdy footwear with good grip can also help you maintain a stable stance while operating the saw.
Don’t forget the workpiece
Safety equipment isn’t just what you wear. Properly supporting and securing the material is one of the most important parts of circular saw safety.
A well-supported workpiece is easier to control and reduces the likelihood of the material moving unexpectedly while you’re cutting. The goal is simple: protect yourself, control the saw and keep the workpiece secure.
Check the Saw Before Use
Before you make a cut, take a moment to check the circular saw. A quick inspection can help identify problems before you start cutting.
Check the blade
Make sure the blade is:
- The correct size and type for your saw
- Properly fitted and securely attached
- Suitable for the material you are cutting
- In good condition, without obvious damage or excessive wear
Never use a blade that is damaged or unsuitable for the saw.
Check the blade guard
The lower blade guard should move freely and return to its normal position as intended. If it appears damaged, sticks or does not operate correctly, don’t use the saw until the problem has been dealt with.
Check the power supply
For a corded circular saw, inspect the cable and plug for obvious damage and make sure the cable can be kept safely away from the cutting path.
For a cordless circular saw, make sure the battery is correctly fitted and secure. Check the battery and saw for any obvious damage.
Check the controls
Before cutting, make sure you know where the:
- Trigger or power switch
- Safety lock or trigger lock
- Depth adjustment
- Bevel adjustment
- Blade guard
are located.
If this is your first time using a particular saw, read the manufacturer’s instructions before operating it.
Important: If anything looks damaged, loose or isn’t working as it should, don’t take a chance. Stop and deal with the problem before using the saw.
How to Set Up Your Workpiece
Before switching on the circular saw, make sure the material is properly supported and cannot move while you cut. A secure workpiece makes the cut easier to control and helps reduce the risk of the saw binding or moving unexpectedly.

Support the material properly
Place the timber, plywood, MDF or other material on a suitable work surface such as:
- Sawhorses
- A suitable workbench
- A dedicated cutting table
- Appropriate supports designed for the job
Make sure the material is supported on both sides of the cutting area where appropriate, while still allowing the blade to pass through without hitting the work surface underneath.
Keep the offcut supported
Think about what will happen to the piece being cut away. The offcut should not be allowed to drop, twist or pinch the blade as the cut progresses. Arrange your supports so the material remains stable throughout the cut.
Secure the workpiece
Where necessary, use suitable clamps to prevent the material from moving.
Keep clamps and other objects well clear of the saw’s cutting path. The blade should never be able to contact a clamp, support or other obstruction.
Check underneath the material
Before cutting, make sure you know what is underneath the workpiece.
There should be no:
- Cables
- Pipes
- Screws or nails that could create a problem
- Other objects that could interfere with the blade
For sheet materials, also make sure the blade depth is set appropriately for the material and cutting conditions, following the saw manufacturer’s instructions.
Mark your cutting line
Measure carefully and mark the line you want to follow. For longer or particularly straight cuts, a suitable straightedge or guide can make it much easier to keep the saw travelling accurately.
The aim is simple: secure the material, keep the cutting path clear and make sure the saw has a stable path before you start.
How to Hold and Position a Circular Saw
Once your workpiece is secure and your cutting line is marked, the next step is positioning yourself and the saw correctly. Good positioning gives you better control and makes it easier to keep the saw travelling smoothly along the cutting line.
Stand in a Stable Position
Stand with your feet comfortably apart and make sure you have enough room to move the saw through the entire cut. Avoid standing directly behind the saw in line with the blade. Position yourself so you can maintain control while keeping a clear view of the cutting area.
Hold the Saw With Both Hands
Use both hands to control the saw as intended by the manufacturer. Keep a firm but comfortable grip and avoid trying to force the saw through the material.
Your hands should remain on the designated handles and well away from the blade and its cutting path.
Position the Saw Before Starting
Place the front of the saw’s base plate securely on the material before beginning the cut, following the manufacturer’s instructions for your particular saw.
Make sure the blade is clear of the material if the saw’s starting procedure requires this, and check that nothing is obstructing the cutting path.
Do not start cutting until you are properly positioned and ready to make the entire cut.
Let the Saw Do the Work
A common beginner mistake is trying to push a circular saw too quickly. Instead, allow the blade to cut at its intended speed and guide the saw steadily along your marked line.
If the saw begins to slow significantly, vibrate excessively or behave unexpectedly, stop and investigate rather than forcing it through the material.
Keep Your Attention on the Cut
As you move the saw forward, keep your attention on the cutting line and the area immediately around it.
Don’t reach across the saw or reposition your hands while the blade is moving.
If you need to change your position or adjust the workpiece, stop the saw first and wait until the blade has stopped moving.
Beginner tip: A controlled, steady cut is more important than cutting quickly. Take your time until you become comfortable with the saw.
How to Make a Straight Cut
A straight cut is one of the most common jobs you’ll do with a circular saw. Once the material is securely supported and your cutting line is marked, the key is to keep the saw moving steadily and under control.

1. Mark Your Cutting Line
Measure carefully and mark the cut using a pencil, square or suitable marking tool. For longer cuts, consider using a straightedge or compatible guide rail. This can make it easier for beginners to maintain a straight, consistent cut.
2. Position the Saw
Place the saw’s base plate securely on the workpiece and align the blade with your cutting line. Make sure you have a stable stance and that the cable, battery and surrounding area are clear of the blade and your movement.
3. Start the Saw Correctly
Follow the starting procedure in your saw’s instructions. Allow the blade to reach its normal operating speed before progressing into the cut, where the manufacturer’s instructions require this. Don’t rush the start of the cut.
4. Guide the Saw Smoothly
Once the cut has started, guide the saw forward at a steady pace. Keep the base plate sitting securely on the material and follow your cutting line or guide.
Don’t force the saw. If the motor slows noticeably, the saw becomes difficult to control or the blade appears to be struggling, stop and investigate rather than pushing harder.
5. Keep the Cut Under Control
Keep both hands on the saw’s intended handles and maintain a comfortable, stable position. Never put your hands in front of or underneath the saw while the blade is moving.
If the saw needs repositioning, stop cutting and wait for the blade to come to a complete stop before making adjustments.
6. Complete the Cut Safely
As you approach the end of the workpiece, maintain control of the saw and continue following the cutting line. Don’t push the saw faster simply because you’re nearly finished.
Once the cut is complete, follow the manufacturer’s instructions for switching off the saw and allow the blade to stop completely before putting the saw down or changing position.
Beginner tip: If you’re struggling to cut a straight line, slow down rather than trying to push harder. A suitable guide can also make a big difference to accuracy.
How to Make a Bevel Cut
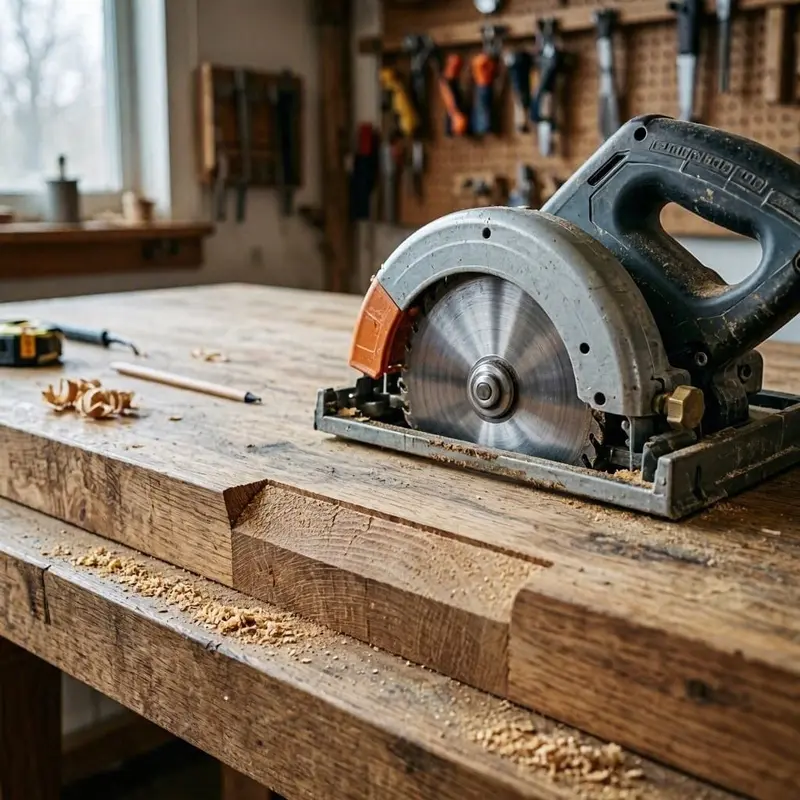
A bevel cut is made with the circular saw blade tilted at an angle rather than cutting straight down at 90°. Many circular saws allow you to adjust the bevel angle, commonly up to around 45°.
Bevel cuts can be useful for jobs such as angled timber joints, trim and certain woodworking projects.
1. Set the Bevel Angle
Before cutting, check the saw’s bevel adjustment and set it to the angle required for your project. Make sure the adjustment is properly secured according to the manufacturer’s instructions.
Remember that tilting the blade reduces the available cutting depth, so don’t assume the saw can cut the same thickness at 45° as it can at 90°.
2. Mark the Cut Carefully
Measure and mark your cutting line just as you would for a normal straight cut. Because the blade is now angled, take extra care when positioning the saw and make sure the line you’re following is the correct one for the finished cut.
3. Secure the Workpiece
Make sure the material is firmly supported before starting. A bevel cut can require a little more care to keep the saw stable, particularly when working with larger pieces of timber.
4. Make the Cut Slowly and Smoothly
Position the saw correctly, start it according to the manufacturer’s instructions and guide it steadily through the material. Don’t force the saw or try to compensate for the angled blade by pushing harder.
Keep both hands on the intended handles and stay aware of the blade’s cutting path.
5. Check the Cutting Depth
Before starting, check that the saw has enough cutting capacity at the selected bevel angle. This is particularly important when cutting thicker timber.
If you’re unsure about how blade size affects cutting capacity, my guide What Size Circular Saw Do I Need for DIY UK? explains the difference between 165mm, 184mm and 185mm saws and their typical cutting depths.
Beginner tip: If you’ve never made a bevel cut before, practise on a piece of scrap timber first. It gives you a chance to check the angle and become comfortable with the saw before making the final cut.
How to Finish the Cut Safely
The final part of the cut deserves just as much attention as the beginning. Don’t relax your grip or rush simply because you’re nearly finished.
1. Keep Control Until the Blade Clears the Material
Continue guiding the saw steadily until the blade has passed through the workpiece. Don’t lift, twist or pull the saw sideways while the blade is still cutting.
2. Don’t Force the Saw at the End
The offcut may become loose as you approach the end of the cut. Keep your hands on the saw’s intended handles and maintain control. Never try to hold the offcut with your free hand while the blade is moving.
If the material needs additional support, stop the saw and make the necessary adjustments safely.
3. Switch Off the Saw
Once the cut is complete, switch the saw off according to the manufacturer’s instructions. Keep hold of the saw until the blade has completely stopped rotating.
Never put a circular saw down while the blade is still moving.
4. Move the Saw Safely
After the blade has stopped completely, place the saw somewhere stable where it cannot accidentally fall, roll or come into contact with anything that could operate the controls.
If you’re making several cuts, don’t rush into the next one. Take a moment to check the workpiece and cutting area before starting again.
Beginner tip: Most circular-saw cuts take only a short time, so there’s little benefit in rushing the final few seconds. Keep control until the saw is switched off and the blade has completely stopped.
Common Circular Saw Mistakes to Avoid
Circular saws are relatively straightforward once you understand the basics, but beginners can make mistakes when they’re still getting used to the tool.
Avoiding these common problems can make your cuts safer and more controlled.
1. Cutting Without Securing the Material
Trying to cut material that can move or shift makes the saw harder to control. Always make sure the workpiece is properly supported and secured before starting.
2. Using the Wrong Blade
A blade designed for one type of material or cutting job may not be suitable for another. Check the blade specification and make sure it is compatible with your saw before using it.
If you’re unsure which blade to choose, see my guide to the best circular saw blades for DIY UK.
3. Cutting Too Quickly
Trying to force the saw through the material can make the cut harder to control. Let the saw and blade do the work and maintain a steady, controlled movement.
4. Ignoring the Cutting Depth
Setting the blade incorrectly can affect both the quality of the cut and how safely the saw operates. Check the required cutting depth and follow the manufacturer’s instructions for setting the saw.
5. Putting Your Hands Too Close to the Blade
Never place your hands in the cutting path or underneath the workpiece while the blade is moving. Keep both hands on the saw’s intended handles whenever the saw is in use.
6. Reaching Across the Saw
Don’t reach across or around a running circular saw to reposition the material or make an adjustment.
Switch the saw off, wait for the blade to stop completely and then make any necessary changes.
7. Lifting or Twisting the Saw During a Cut
Try to keep the saw’s base plate stable against the workpiece and guide it along the intended cutting line.
Avoid twisting or lifting the saw while the blade is engaged with the material.
8. Ignoring Unusual Sounds or Movement
If the saw starts vibrating excessively, behaves unexpectedly, or produces an unusual sound, stop cutting.
Switch it off and investigate the problem before continuing.
9. Forgetting What Is Underneath the Material
Before making a cut, check the area beneath the workpiece. Make sure there is nothing that could interfere with the blade, including cables, pipes, supports or other objects.
10. Rushing the End of the Cut
The last part of a cut can be tempting to rush, particularly when you’re nearly finished. Keep control of the saw until the cut is complete, then switch it off and wait for the blade to stop completely.
Beginner tip: You don’t need to be fast to use a circular saw well. Good preparation, a secure workpiece and controlled movements are much more important than cutting quickly.
Corded vs Cordless Safety Considerations
Both corded and cordless circular saws can be useful for DIY, but there are a few safety differences worth understanding.
Corded Circular Saws
With a corded saw, the main additional consideration is the power cable.
Keep the cable:
- Away from the blade and cutting path
- Clear of your feet and working area
- Positioned so it won’t become caught or pulled during the cut
- Long enough to allow comfortable movement without stretching
Never allow the cable to become part of the cutting area.
Cordless Circular Saws
Cordless saws remove the power cable from the cutting area, which can make working in awkward locations more convenient. However, you still need to check the battery and saw before use. Make sure the battery is properly fitted and that there is no obvious damage to the battery or tool.
If you need to change the blade, adjust the saw or carry out maintenance, follow the manufacturer’s instructions and make sure the saw is in a safe, non-operating state before doing so.
If you’re deciding between the two types, my Corded vs Cordless Circular Saws guide explains the differences in power, portability, battery runtime and everyday DIY use.
Whichever Type You Choose
The basic safety principles remain the same:
- Secure the workpiece
- Use the correct blade
- Keep the cutting path clear
- Keep your hands away from the blade
- Maintain a stable position
- Don’t rush the cut
- Stop if something doesn’t feel or sound right
For UK DIY users, the important thing is choosing a saw that you can comfortably control and using it according to the manufacturer’s instructions.
Circular Saw Safety Checklist
Before making a cut, run through this quick checklist. It can be especially useful when you’re new to using a circular saw.
Before cutting:
- ☐ Read the manufacturer’s instructions for your saw
- ☐ Check the saw and blade for obvious damage
- ☐ Make sure the blade is suitable for the material
- ☐ Check the blade guard operates correctly
- ☐ Set the cutting depth appropriately
- ☐ Set the bevel angle correctly if required
- ☐ Mark the cutting line carefully
- ☐ Secure and properly support the workpiece
- ☐ Check underneath and around the cutting area
- ☐ Make sure cables, batteries and other equipment are clear
- ☐ Wear appropriate PPE for the job
- ☐ Make sure you have a stable stance and clear working area
During the cut:
- ☐ Keep both hands on the saw’s intended handles
- ☐ Keep your hands away from the blade and cutting path
- ☐ Keep the saw stable on the workpiece
- ☐ Guide the saw steadily rather than forcing it
- ☐ Keep watching the cutting area
- ☐ Stop if the saw behaves unexpectedly
After the cut:
- ☐ Switch the saw off
- ☐ Wait for the blade to stop completely
- ☐ Put the saw down safely
- ☐ Only then reposition the workpiece or prepare for another cut
A Simple Rule for Beginners
If something doesn’t look, sound or feel right, stop cutting.
It’s much better to take a few minutes to check the saw, workpiece or setup than to continue with something you’re not comfortable with.
For additional UK workplace and equipment safety information, you can also refer to the HSE guidance on using work equipment safely.
When Should You Stop Cutting?
Knowing when to stop is just as important as knowing how to start a cut. If something changes unexpectedly while you’re using the circular saw, don’t try to push through it.
Stop if the Saw Behaves Unexpectedly
Switch the saw off and investigate if you notice:
- Unusual vibration
- Unexpected noise
- The blade appearing to struggle
- The saw becoming difficult to control
- The material moving unexpectedly
- The blade becoming trapped or behaving unusually
Don’t try to solve the problem while the blade is still moving.
Stop if the Workpiece Moves
If the timber or sheet material shifts during the cut, stop and allow the blade to come to a complete stop.
Reassess the support and securing arrangement before continuing.
Stop if You Lose Your Position
If you become uncomfortable, lose your footing or feel that you can no longer control the saw properly, stop.
There is no benefit in trying to finish a cut when you’re not in a stable position.
Stop if You’re Unsure
If you’re unsure about the correct blade, cutting depth, bevel setting or operating procedure, stop and check the manufacturer’s instructions before continuing.
A good rule for beginners is simple: if you’re no longer completely comfortable and in control, stop the saw.
Taking a few extra minutes to reset the workpiece or check the instructions is always preferable to rushing the job.
Frequently Asked Questions
Is a circular saw safe for beginners?
Yes. A circular saw can be suitable for DIY beginners when it is used correctly and according to the manufacturer’s instructions.
The most important things are understanding the controls, securing the workpiece, using the correct blade, keeping your hands away from the cutting path and maintaining control throughout the cut.
Should I wear safety glasses when using a circular saw?
Yes. Eye protection is strongly recommended because cutting can produce dust and small particles.
Choose suitable safety eyewear that provides appropriate protection for the task.
Do I need ear protection?
Circular saws can be loud, particularly during longer cutting sessions.
Hearing protection can therefore be appropriate, especially when working for extended periods or in enclosed spaces.
Should I wear gloves when using a circular saw?
Don’t assume that gloves are automatically safer. Follow the manufacturer’s instructions and consider the specific risks of the task.
The priority is maintaining proper control of the saw and keeping your hands away from the blade.
How do I stop a circular saw safely?
Once the cut is complete, switch the saw off according to the manufacturer’s instructions and maintain control of it until the blade has completely stopped.
Never put the saw down while the blade is still rotating.
Can I use a circular saw without securing the timber?
You should not attempt to cut material that can move unexpectedly.
Properly support and secure the workpiece before cutting so the saw can be controlled throughout the cut.
What should I do if the circular saw gets stuck?
Stop cutting and switch the saw off. Keep control of the saw and wait for the blade to stop completely before attempting to investigate or make adjustments.
Don’t try to force the saw through the material.
Is a cordless circular saw safer than a corded one?
Not necessarily. A cordless saw removes the power cable from the cutting area, which can be convenient, but both types still require the same basic safety precautions.
The safest option is the saw you can use correctly and control confidently.
How fast should I push a circular saw?
There isn’t one universal speed. Guide the saw steadily and allow the blade to do the cutting rather than forcing it through the material.
If the saw struggles or becomes difficult to control, stop and investigate.
Can I use a circular saw in wet conditions?
Follow the manufacturer’s instructions and only use the saw in conditions for which it is designed.
Electrical equipment should not be used where moisture creates a risk unless it is specifically suitable for those conditions.
Final Verdict
Using a circular saw safely doesn’t have to be complicated. For beginners, the most important thing is to build good habits from the start.
Before every cut:
- Check the saw and blade
- Secure and support the workpiece
- Wear appropriate PPE
- Keep the cutting area clear
- Position yourself securely
- Keep both hands on the saw’s intended handles
- Guide the saw steadily without forcing it
- Switch off and wait for the blade to stop completely before putting the saw down
The safest approach is to prepare properly, stay in control and never rush the cut.
A circular saw is a very useful tool for DIY projects, but treat it with respect every time you use it. If you’re ever unsure about the correct procedure, blade, setting or condition of the saw, stop and check the manufacturer’s instructions before continuing.