By Enda McLarnon — Experienced UK DIYer sharing practical fixes from my 1958 red brick home.
Disclosure: As an Amazon Associate, I earn from qualifying purchases made through links on this page. If you buy a tool through my links, it costs you nothing extra, but the small commission helps me keep this site running.
For many UK woodworkers and DIYers, buying an entry-level benchtop table saw, such as an Evolution, Ryobi, Scheppach, or VonHaus, allows them to work on larger sheet-goods projects. Priced between £150 and £300, these compact saws promise jobsite portability and fast ripping capabilities.
However, when I read through the owner forums and checked the retail review sections, a consistent pattern emerges. I noticed recurring issues such as burning along cut edges, severe blade binding, kickback scares, and fences that drift out of parallel by up to 3mm.
The problem is rarely the motor itself. Budget manufacturers save costs on structural extrusions, plastic miter gauges, and lightweight fence clamping mechanisms.
The good news? Most budget table saw issues can be calibrated out or fixed with low-cost accessories and simple workshop adjustments. Here are the 5 most common failures on budget table saws and how to resolve them.
1. Rip Fence Deflection (Out of Parallel)
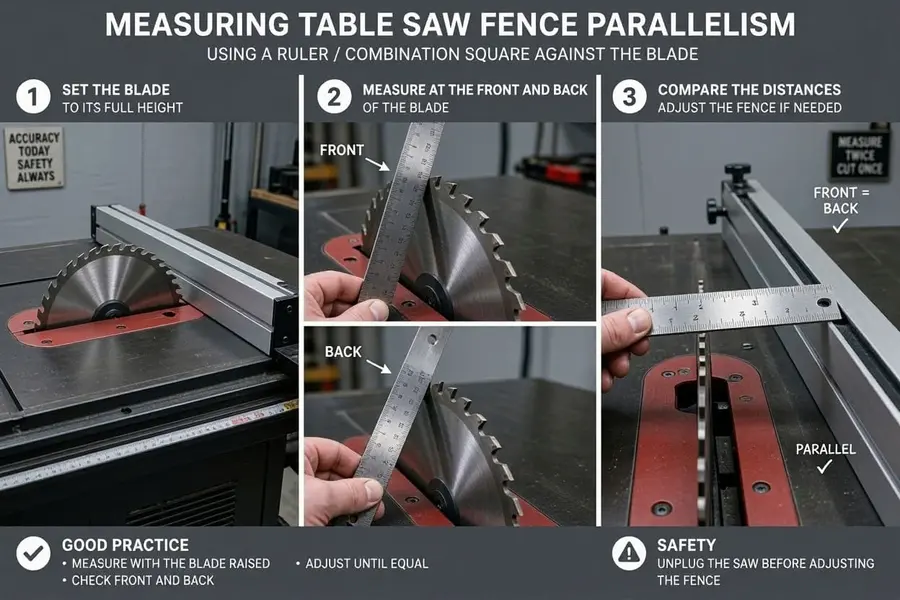
The rip fence is the single most critical safety and accuracy component on a table saw. On budget saws, the fence typically clamps only at the front rail. When you push timber against it, the rear end flexes away from the blade, or worse, toes inward toward the rear teeth, causing dangerous kickback.
The Fix: 3-Step Fence Calibration
- The Parallel Rule: Set your fence to a fixed measurement (e.g., 100mm). Measure the distance from the front tip of a blade tooth to the fence (A). Rotate the blade so that same tooth is at the rear, and measure again (B).
- Set Toe-Out: The rear measurement (B) should be 0.5mm wider than the front (A). A fraction of a millimeter of “toe-out” prevents the rear teeth from pinching timber against the fence.
- Add a Rear Locking Cam or Secondary Clamp: If your front clamp won’t hold, use a mini F-clamp or locking G-clamp on the rear table lip every time you set a rip width.
2. Sloppy Plastic Mitre Gauges (Excess Slot Play)
The mitre gauge included with budget table saws is almost always made of thin stamped plastic or loose aluminium bar stock. The bar slops back and forth inside the table’s T-slot, making accurate 90 degree crosscuts or 45 degree mitres impossible.
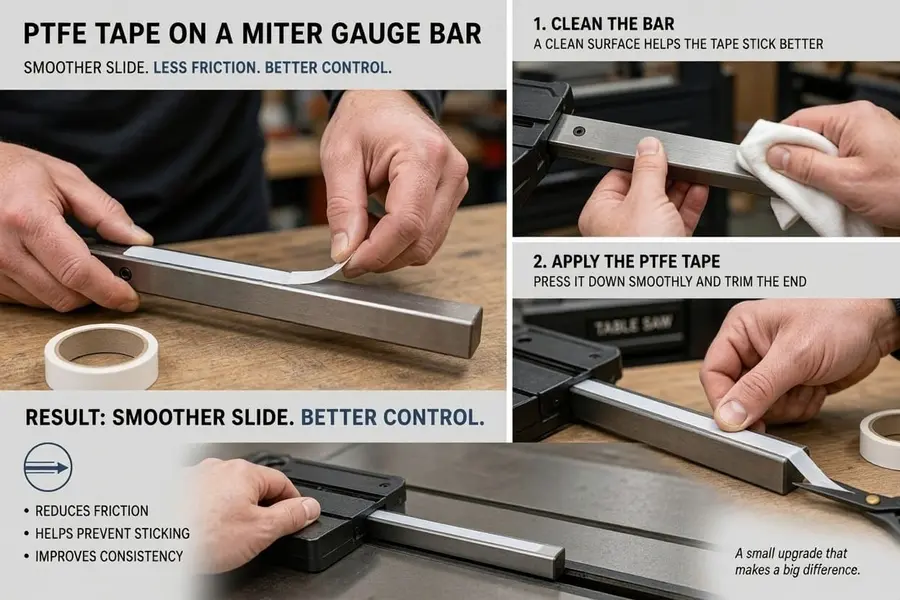
The Fix: Tape Shimming or Aftermarket Steel Bars
- The Quick Workshop Hack: Apply strips of low-friction PTFE (Teflon) tape or thin UHMW tape along the side face of the runner bar to take up the 0.5mm side play.
- The Permanent Upgrade: Replace the stock runner with a steel mitre bar featuring adjustable expansion washers (such as an aftermarket Incra or Trend mitre gauge bar) that lock zero-play into standard 19mm (3/4 inch) slots.
3. Blade Arbor Runout & Burn Marks on Hardwood
If your cuts leave dark scorch marks or deep saw-tooth ridges in timber, your saw blade is either wobbling on its arbor (arbor runout) or choked with pitched up resin. Budget saws often ship with cheap, thick kerf 24 tooth construction blades designed for rough framing, not clean joinery.
The Fix: Clean, Dampen, and Downsize Kerf
- Switch to Thin-Kerf Blades: High-mass budget motors (1500W brushed) struggle under heavy loads. Switch to a thin-kerf 40T or 60T finishing blade (like CMT, Freud, or Trend Craft Pro). A thinner kerf removes less material, placing significantly less strain on the motor.
- Clean the Arbor Flange: Remove the blade and clean both arbor washers with wire wool. A single spec of sawdust trapped behind the flange translates to severe blade wobble at the outer teeth.
4. Sticky or Binding Bevel / Height Adjustment Gear
Budget table saws use exposed plastic or cast zinc lead-screws to raise, lower, and tilt the trunnion. Sawdust mixes with factory shipping grease, forming a gummy concrete like paste that locks up height adjustment wheels.
The Fix: Dry Lubrication Overhaul
- Degrease the internal elevation threads and gear teeth using brake cleaner or a dedicated workshop solvent.
- Never apply wet grease or oil, as this attracts fresh sawdust immediately.
- Coat the lead screw threads liberally with a Dry PTFE Spray or silicone lubricant. This repels dust while keeping height adjustments smooth.
5. Dangerous Sheet-Goods Sag (Inadequate Outfeed Support)
Because budget table saw tops measure roughly 600mm by 600mm, pushing a full 1220 x 2440 mm sheet of 18mm MDF over the blade causes the board to tilt as it exits the table. Trying to hold the board down while reaching for the power switch is a major cause of jobsite accidents.
The Fix: Outfeed Roller Stands & Zero-Clearance Inserts
Never attempt to rip long stock or sheets without independent outfeed support. Position a folding roller stand directly behind the saw, set 2mm lower than the saw bed height so it catches timber smoothly as it exits the riving knife.
You may also be interested in my circular saw guide, where I also cover setup and guides. You may also be interested in my dust port sizing issues and some useful fixes.
Recommended Upgrades & Where to Buy
To transform a budget table saw into a precise, reliable workshop workhorse, consider these essential tune-up supplies and trade upgrades:
“If your jobsite saw bogs down on deep ripping cuts, swap the stock blade for a [Trend CraftPro thin-kerf saw blade on Amazon] or order [Freud Pro thin-kerf ripping blades] to reduce strain on lower-wattage motors.”
“To keep cast iron or aluminium tables slick without attracting sawdust paste, coat the top with [WD-40 Specialist Dry PTFE Lubricant spray on Amazon]
“When aligning your rip fence parallel to the mitre slot, use a [digital magnetic angle finder on eBay] or a [Trend digital angle rule on Amazon] to verify blade tilt before taking test cuts.”
“If the fence binding persists on undersized rails, line the contact runner with [self-adhesive low-friction PTFE tape on eBay] to eliminate slop and ensure smooth micro-adjustments.”

About the Author: Enda McLarnon
I’m an experienced UK DIYer tackling renovation life inside a 1958 red brick home.
I built this blog to help beginners conquer home maintenance anxiety and save a fortune on expensive trade calls.