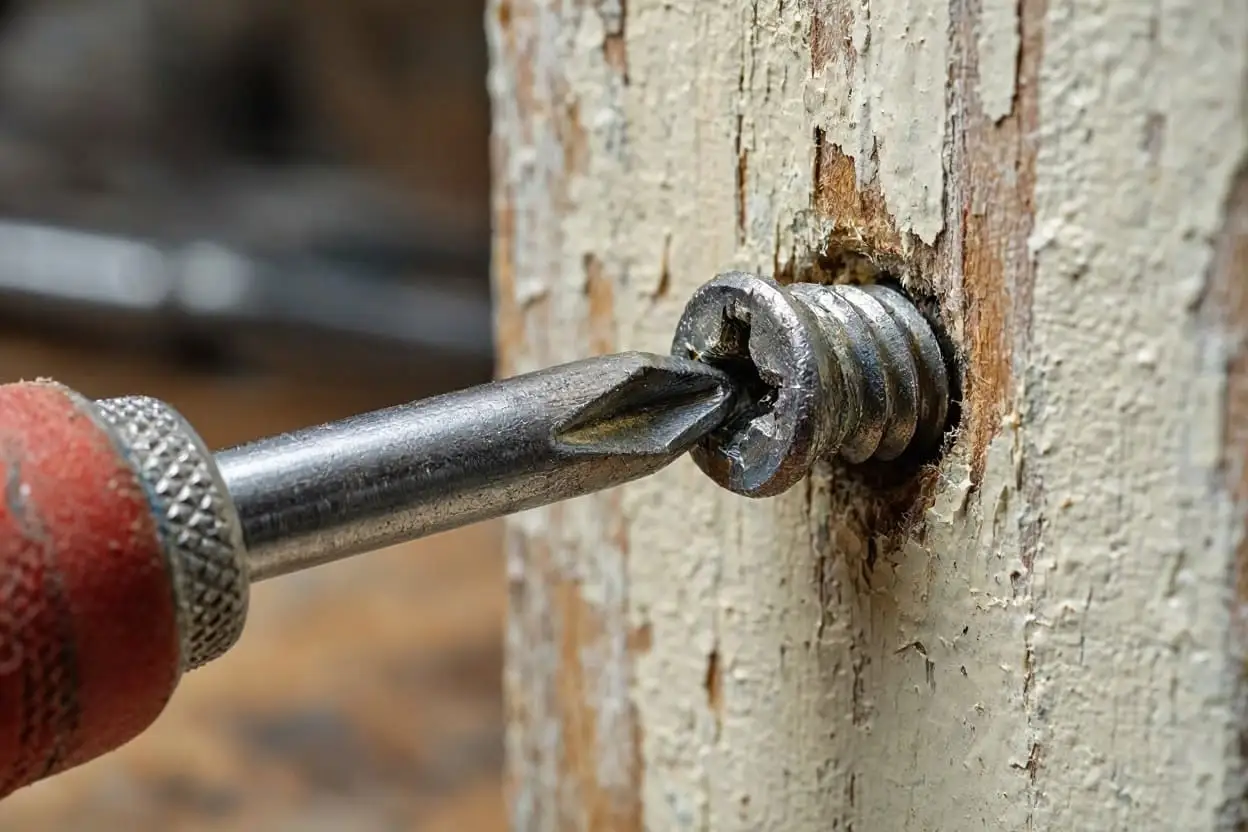
How to Remove a Stripped Screw: Start Here
A stripped screw can turn a straightforward DIY job into a frustrating one. The screwdriver slips out of the head, the grooves become rounded and the screw becomes increasingly difficult to turn.
The good news is that you can often remove a stripped screw without damaging the surrounding material. The best method depends on how badly the screw head is damaged, whether the screw is exposed or recessed, and whether it is fitted into wood, metal, furniture or another material.
Before reaching for a drill or a screw extractor, start with the simplest checks. Make sure you’re using the correct screwdriver type and size, and inspect the screw head to see how much of its original shape remains.
In this guide, I’ll work through practical methods in order, starting with options that need only basic tools and moving on to more involved techniques if necessary. We’ll also explain which approaches are suitable for different situations and when it’s better to stop before causing further damage.
Knowing how to remove a stripped screw starts with identifying how badly the screw head is damaged. A slightly worn screw may come out with the correct screwdriver, while a badly stripped screw may need pliers or a screw extractor. Choosing the least aggressive method first can help prevent damage to the surrounding material.
What Is a Stripped Screw?
A stripped screw is one whose head has become damaged enough that the screwdriver or bit can no longer engage with it properly. The recess may be rounded, worn away or damaged by repeated attempts to turn it.
This can happen when you use the wrong screwdriver type or size, apply too much force, use a worn bit or drive a screw at an angle. A screw can also become difficult to remove because it is rusted, overtightened or stuck in the material. In those cases, the head may not be stripped initially, but repeated slipping can quickly damage it.
Before you begin: Stop turning the screw if the bit keeps slipping. Continuing to force it usually makes the damage worse and reduces the chances of removing it easily.
Check the Screwdriver and Screw Head
Before trying to remove a stripped screw, check whether you’re using the correct screwdriver or bit. A driver that is too small, too large or the wrong type can slip out of the screw head, causing further damage.
For example, Phillips and Pozidriv screwdrivers are not interchangeable, even though the heads can look similar. Using a Phillips bit in a Pozidriv screw, or the other way around, can lead to slipping and damage. If you’re unsure which type you need, see my guide to Phillips vs Pozidriv screwdrivers.
Choose the Correct Size
The screwdriver or bit should fit snugly into the screw head, with as little movement as possible. If it rocks from side to side or slips out when you apply gentle turning pressure, try a different size or type.
A worn screwdriver bit can cause the same problem, so check the tip for rounded edges or other damage. Our guide to how to choose the right screwdriver explains how to match the driver to the screw head.
Clear Dirt From the Screw Head
Dust, paint, rust or other debris can prevent the screwdriver from seating properly. Carefully remove loose dirt with a small brush or suitable tool, taking care not to damage the remaining recess.
Once the screw head is clean, press the screwdriver firmly into place and try turning it slowly. Keep the driver straight and apply steady pressure rather than forcing it.
If the screwdriver still slips, stop. The screw head may be too damaged for a standard screwdriver to grip reliably, so move on to another method rather than making the damage worse.
1. Try a Rubber Band or a Different Screwdriver Bit
If the screw head is only slightly stripped, you may still be able to remove it with a standard screwdriver and a little extra grip.
Try the Rubber Band Method
A wide, thick rubber band can sometimes help when a screwdriver slips in a screw head that is only slightly damaged.
- Place a piece of rubber band flat over the screw head.
- Press the correct screwdriver firmly into the rubber band and screw recess.
- Keep the screwdriver straight and apply steady turning pressure.
- If the screw begins to turn, continue slowly until it comes free.
The rubber helps fill small gaps between the screwdriver and the damaged recess, improving the grip.
When it works: This method is most useful when the screw head is only mildly worn and the screwdriver can still engage with it.
When it won’t work: If the screw head is badly rounded or the screwdriver cannot engage at all, a rubber band is unlikely to help. Stop if the bit continues to slip.
Try a Slightly Different Bit
If the rubber band does not help, try another compatible screwdriver bit. Sometimes a different brand or a slightly different fit can engage with the remaining edges of a damaged screw head more effectively.
Choose a bit that fits securely and press it firmly into the recess before turning. Do not force an oversized bit into the screw head, as this may damage it further.
Avoid repeatedly trying different bits once the head is becoming more damaged. If you cannot get a reliable grip, move on to a method designed for removing stripped screws.
2. Remove a Stripped Screw With Pliers
If the screw head is sticking out above the surface, locking pliers or narrow-jaw pliers may give you enough grip to turn it without relying on the damaged recess.
This method is particularly useful for screws in timber, furniture and other situations where the head is accessible.
How to Use Pliers to Remove a Stripped Screw
- Check that enough of the screw head is exposed for the pliers to grip securely.
- Position the pliers around the outside edge of the screw head.
- Grip firmly without crushing the head or damaging the surrounding material.
- Turn the screw slowly in an anti-clockwise direction.
- Once the screw begins to move, continue turning carefully until it can be removed.
Locking pliers can be helpful because they maintain a firm grip while you turn the screw.
Protect the Surrounding Surface
If the screw is fitted into finished wood, a cabinet or a piece of furniture, take care not to scratch or dent the surface. You can place a thin piece of protective material between the pliers and the workpiece, provided it does not make the grip unstable.
Avoid gripping too lightly, as the pliers may slip. However, do not apply excessive force if the screw refuses to move.
When this method works: Pliers are most effective when the screw head protrudes enough for a secure grip.
When to try something else: If the screw is flush with the surface, recessed or too badly damaged to grip around its edges, a screw extractor may be a better option.
3. Use a Screw Extractor to Remove a Stripped Screw
A screw extractor is a specialist tool designed to remove screws with damaged heads. It can be useful when a normal screwdriver or pliers cannot get a secure grip.
Extractor designs vary. Some use a hardened, reverse-threaded tip, while others require a small pilot hole before the extractor can engage with the screw. Always follow the instructions supplied with your particular tool.
How to Use a Screw Extractor
- Choose the correct extractor. Check that it is suitable for the screw size and material you are working with.
- Prepare the screw head. Clean away loose dirt and make sure the workpiece is securely supported.
- Drill a pilot hole if required. Some extractors need a small hole in the centre of the damaged screw. Use the specified drill-bit size and take care to keep the hole centred.
- Fit the extractor. Position it as instructed by the manufacturer so that it can grip the screw securely.
- Turn slowly. Apply controlled turning force in the specified direction. Avoid sudden movements or excessive pressure.
- Remove the screw. Once it starts to loosen, continue carefully until it comes free.
Some extractors are designed to work with a hand tool, while others are compatible with a drill or driver. Do not assume every extractor works in the same way.
Important Tips When Using a Screw Extractor
- Use eye protection when drilling or removing damaged screws.
- Secure the workpiece so it cannot move.
- Keep the pilot hole centred to avoid damaging the surrounding material.
- Do not force the extractor if it fails to bite into the screw.
- Avoid using excessive torque, as a broken extractor can be extremely difficult to remove.
When to use this method: A screw extractor is worth considering when the screw head is badly damaged and simpler methods have failed.
If the screw is small, deeply recessed or fitted into a delicate workpiece, take extra care. It may be better to seek advice before drilling into it.
4. Drill Out a Stripped Screw
If the screw cannot be removed with a screwdriver, pliers or a suitable screw extractor, drilling it out may be the last resort. This method can remove the screw, but it carries a greater risk of damaging the material around it.
Drilling is generally more suitable for situations where the screw can be accessed safely and the surrounding workpiece can tolerate some careful drilling.
How to Drill Out a Stripped Screw
- Secure the workpiece. Make sure the material cannot move while you work.
- Choose a suitable drill bit. Start with a bit appropriate for the screw and the material. If you intend to remove the screw head, the bit must be selected carefully to avoid unnecessarily enlarging the hole.
- Mark the centre. Aim to drill centrally into the screw so the bit does not wander into the surrounding material.
- Drill slowly and steadily. Use controlled pressure and keep the drill aligned with the screw. Do not force the bit if it catches or wanders.
- Check your progress. Stop periodically to see whether the screw head has loosened or separated. Avoid drilling deeper than necessary.
- Remove the remaining screw. If the head separates, you may be able to lift away the material it was securing and grip the remaining screw shaft with pliers.
The exact process depends on the screw, its size and the material it is fitted into. If you are unsure which drill bit to use or how far to drill, stop and check before proceeding.
Safety Precautions
- Wear suitable eye protection and secure loose clothing and hair.
- Keep your hands clear of the drill bit and rotating parts.
- Check for hidden electrical cables or pipes before drilling into walls or other building materials.
- Avoid drilling into hardened steel or other materials unless you have the correct equipment and know how to proceed safely.
- Stop if the bit overheats, wanders off-centre or becomes stuck.
Important: A broken screw extractor or drill bit can make removal much harder. If the screw is in an expensive or delicate item, or drilling could damage the surrounding material, consider asking a professional for help rather than risking further damage.
When using drills or cutting tools, follow the manufacturer’s safety instructions and wear suitable eye protection. The Health and Safety Executive’s woodworking guidance provides further advice on working safely with woodworking equipment.
5. Cut a New Slot in a Stripped Screw Head
If the screw head is badly damaged but still accessible, you may be able to cut a new slot and remove it with a flat-head screwdriver.
This method is sometimes useful for screws with a flat or raised head. However, it is less suitable for small screws, recessed screws or screws fitted into delicate materials.
How to Cut a New Slot
- Check the available space. Make sure the screw head is exposed and there is enough room to work without damaging the surrounding material.
- Choose a suitable cutting tool. A rotary tool with an appropriate cutting disc may be suitable, provided you can control it safely.
- Secure the workpiece. Prevent the material from moving and protect nearby surfaces from sparks or accidental contact.
- Cut a shallow slot. Work carefully across the screw head, keeping the cut centred. Do not cut deeper than necessary.
- Use a flat-head screwdriver. Choose a blade that fits the new slot closely, press it firmly into place and turn slowly to loosen the screw.
Take Care When Cutting Metal
Cutting discs can break, throw debris and generate heat or sparks. Wear suitable eye protection and follow the tool manufacturer’s safety instructions. Check that nearby materials are not flammable and that the cutting disc is suitable for the tool and task.
Avoid this method where sparks or heat could damage nearby components, finishes or materials.
When to use it: Cutting a new slot may be worth considering when the screw head is accessible and other straightforward methods have failed.
When to avoid it: If the screw is recessed, very small or close to delicate materials, a suitable screw extractor or professional assistance may be a safer choice.
8. How to Remove a Stuck or Rusted Screw
Sometimes a screw becomes difficult to remove because it is rusted, overtightened or stuck in the material. If the screwdriver keeps slipping, the head can become stripped as you try to loosen it.
The key is to deal with the resistance without causing further damage to the screw head.
Try a Suitable Penetrating Oil
For an accessible metal screw that is seized by corrosion, a penetrating oil may help loosen the joint.
- Check that the product is suitable for the material and application.
- Apply a small amount around the screw where it enters the material, following the product instructions.
- Allow time for it to work as directed on the label.
- Use the correct screwdriver or bit and try turning the screw slowly.
Penetrating oil is not suitable for every situation. It can stain wood, damage some finishes or contaminate surfaces that need to be painted or glued. Avoid using it near electrical equipment or other areas where the product could create a hazard.
Use Controlled Pressure
Once the screw has had time to loosen, press the screwdriver firmly into the head and turn steadily. Avoid sudden twisting movements, which can make the bit slip.
If the screw starts to move, work it back and forth gently rather than forcing it through the full turn in one movement.
What If the Screw Still Will Not Move?
If the screw remains stuck, stop before the head becomes more damaged. Depending on how much of the head is exposed, you may be able to use pliers or a screw extractor.
Do not apply uncontrolled heat to a stuck screw. Heat can damage nearby materials, finishes, plastic components and concealed items. It can also create a fire risk, particularly where penetrating oils or other flammable products have been used.
The main rule is simple: If the screw will not move with controlled pressure, change your approach rather than forcing it.
Common Mistakes When Removing a Stripped Screw
Removing a stripped screw is often straightforward if you choose the right method early. However, a few common mistakes can make the job harder and increase the risk of damaging the surrounding material.
Using the Wrong Screwdriver
Phillips and Pozidriv screw heads can look similar, but using the wrong driver can cause slipping and damage. Always check the screw type and choose a bit that fits securely.
Continuing When the Bit Slips
Repeatedly turning a screwdriver that will not grip can quickly round off the remaining edges of the screw head. If the bit slips more than once, stop and reassess the situation.
Applying Too Much Force
Excessive force can damage the screw head, snap the screw or cause the screwdriver to slip unexpectedly. Use steady pressure and controlled movements instead.
Using Pliers on a Recessed Screw
Pliers need enough of the screw head or shaft exposed to grip securely. If the screw sits flush with or below the surface, another method may be more appropriate.
Drilling Without Checking the Material
Drilling too far off-centre can enlarge the hole or damage the workpiece. Before drilling, secure the material, choose a suitable bit and check for hidden cables or pipes where relevant.
Forcing a Screw Extractor
Screw extractors can be brittle, and excessive torque may break the tool inside the screw. Follow the manufacturer’s instructions and stop if the extractor will not grip properly.
Ignoring Safety Precautions
Wear suitable eye protection when drilling or cutting metal. Secure the workpiece, keep hands clear of rotating tools and make sure your working area is safe before starting.
The best approach is to start with the least aggressive method and move on only when necessary. This gives you the best chance of removing the screw without damaging the surrounding material.
Frequently Asked Questions
What is the easiest way to remove a stripped screw?
Start by checking that you’re using the correct screwdriver type and size. If the head is only slightly damaged, a thick rubber band may improve the grip. If the screw head is exposed, pliers may work. More severely damaged screws may require a screw extractor.
Can you remove a stripped screw without a drill?
Yes. Depending on the condition of the screw, you may be able to remove it with the correct screwdriver, a rubber band or pliers. A drill is usually a later option when simpler methods have failed.
Does the rubber band trick work on stripped screws?
It can work when the screw head is only slightly damaged. The rubber band helps fill small gaps between the screwdriver and the recess. It is unlikely to work if the screw head is badly rounded or the driver cannot engage properly.
How do you remove a stripped screw from wood?
Start with the correct screwdriver or bit. If the head is exposed, try gripping it with pliers. A screw extractor may help with a badly damaged head, while drilling should generally be treated as a last resort. Take care to avoid enlarging the hole or damaging the wood.
How do you remove a stripped screw from metal?
Try the correct screwdriver or bit first. If the head is exposed, pliers may provide enough grip. A suitable screw extractor may help if the recess is badly damaged. For a seized or rusted screw, a compatible penetrating oil may also help, provided it is safe for the application.
When should you stop trying to remove a stripped screw?
Stop if the screw head is becoming more damaged, the tool keeps slipping or an extractor or drill bit begins to bind. If the screw is in a delicate, valuable or difficult-to-access item, professional help may prevent more costly damage.
Final Thoughts
A stripped screw can be frustrating, but it does not always mean you need specialist tools or have to damage the surrounding material.
Start by checking the screwdriver and screw head, then try simple methods such as a rubber band or pliers where appropriate. If those fail, a suitable screw extractor may help. Drilling or cutting a new slot should be reserved for situations where the simpler options are unsuitable or unsuccessful.
The most important thing is to stop when a method is making the damage worse. Working patiently and choosing the right approach will give you a better chance of removing the screw cleanly.
For more practical DIY advice, explore our other UKToolGuide guides to screwdrivers, screwdriver sizes and common hand tools.