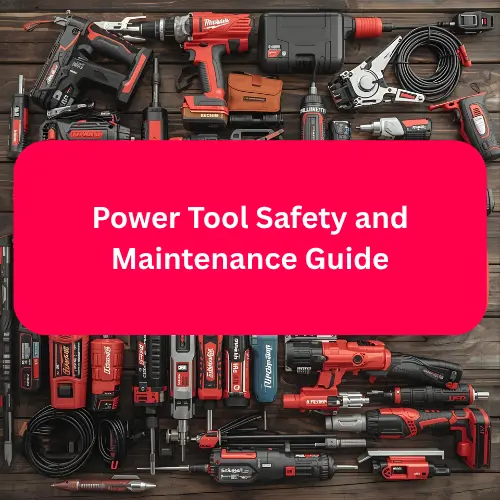
In the hands of a professional, a power tool is really just a means to speed, precision, and profit when working on any task or job. For someone who enjoys DIY, or needs to get jobs done around the home, it is also a vital investment in getting jobs done faster and more efficiently..
However, too many owners treat their tools as disposable assets. We mean by that is they tend to ignore basic care and safety protocols that dictate both the tool’s lifespan and the user’s well-being. The result? For most it means premature failure of expensive components, reduced efficiency, and avoidable accidents.
This isn’t just a guide from us, it is fully understanding how following safety and some basic maintenance just makes common sense. True longevity and efficiency aren’t found in buying the latest model, but in a three pronged strategy that covers your safety, some proactive maintenance, and being able to make a better, more informed selection.
To help with that, we will move beyond the usual vague general instructions, and provide you with the detailed, expert level knowledge required to protect your tools, your materials, and your body.
By implementing the robust systems outlined here, you will not only guarantee the longest possible lifespan for your power tools but also elevate your standard of workmanship and safety compliance.
This guide serves as the definitive hub, connecting you to in-depth, expert analysis on every critical component of tool ownership.
The Foundation: Prioritizing Diligent Safety
Safety is so important to understand when it applies to tool ownership. It really is non-negotiable and extends far beyond wearing glasses. Implementing rigorous safety protocols not only protects you from severe injury but also protects your tools and materials from catastrophic damage.
1.1 Personal Protective Equipment (PPE) Essentials (UK Focus)
Every UK tradesman and serious DIYer must adhere to the core principles of the Health and Safety Executive (HSE). Compliance begins with mandatory, high-quality PPE.
Never compromise on gear as it is cheaper than a trip to A&E or a ruined project.
Eye and Hearing Protection: The First Line of Defence
- Eyes: Safety glasses or goggles are mandatory for all power tool operations. Choose glasses rated to EN166 F (low energy impact) or, for grinding and heavier demolition, EN166 B (medium energy impact). Always ensure the glasses provide side shielding to protect against flying debris from peripheral angles. You only get one pair of eyes!
- Ears: Hearing damage is cumulative and irreversible. Use earplugs (SNR 25+) for intermittent, medium-noise tools (like drills or sanders) and ear defenders (SNR 30+) for prolonged or extremely loud operations (like circular saws, routers, or angle grinders). The noise levels of a circular saw often exceed 100 dB, requiring maximum protection.
 |  |  |
|---|
Hand and Lung Protection: The Hidden Hazards
- Hands: Avoid loose-fitting gloves that can be caught in rotating parts (especially drills, grinders or routers). Instead, use close-fitting, puncture-resistant gloves (rated to EN388) for handling rough materials or sharp blades.
- Lungs (Dust Control): Silica, wood, and plaster dust are classified carcinogens. Always use an FFP3-rateddisposable respirator when generating fine dust. Furthermore, utilize dust extraction systems (M-Class or H-Class vacuums in the UK) with all tools where possible. This not only protects your lungs but also keeps dust out of the tool’s motor housing, extending its life.
1.2 Tool-Specific Risk Management: Mitigating Kickback
Kickback is the sudden, violent reaction of a cutting tool being unexpectedly thrown back towards the user. That makes it the cause of some of the most severe power tool injuries. It is most common in circular saws, table saws and saws in general.
Circular Saw Protocols:
- Blade Depth: Set the blade depth so that the lowest gullet (the space between teeth) is just visible beneath the material. Too much blade exposed increases the contact surface area and kickback risk.
- Kerf Check: Ensure the cut line (kerf) remains open. If the material warps or binds and pinches the back of the blade, kickback is imminent. Use a riving knife (a standard feature on many modern saws) or a wedge/featherboard to keep the kerf open.
- Body Position: Never stand directly behind the saw. Stand slightly to one side, ensuring your body is clear of the plane of potential kickback.
Angle Grinder Safety: Grinders are also high-RPM, high-risk tools. Always use the correct guard for the task and ensure it is positioned between the spinning wheel and your face.
Never operate a grinder without its side handle, as the handle is essential for controlling the tool’s massive rotational forces, especially on start up.
1.3 The Ultimate Worksite and Pre-Operation Checklist
A clean, organized site is a safe site. The majority of accidents stem from distraction, obstruction, or complacency. When we get busy on a job, we tend to forget about where we are working and what is laying around.
- Workpiece Securement: NEVER hold material by hand. Use clamps or vices to secure the workpiece firmly to a solid surface. Movement during cutting or drilling is the primary trigger for tool binding and kickback.
- Cable and Cord Management: Ensure all cords are routed away from the cutting path and the walking area to prevent tripping and accidental cutting. For corded tools, ensure the cord is in good condition, free of nicks or exposed wires.
- Tool Inspection: Before plugging in or inserting a battery, perform a Pre-Operation Visual Check. Look for loose screws, cracked housing, damaged power cords, or signs of overheating. Ensure the blade, bit, or accessory is correctly seated and tightened.
Safety Starts with Selection
Safety isn’t just about how you operate a tool. That actually begins the moment you decide which tool to buy. A poorly matched tool, such as a cheap budget drill struggling with heavy masonry, is inherently unsafe because it encourages misuse, overheating, and user fatigue. That’s not to mention the frustration!
Making the right investment ensures you have the power and features necessary to complete the job efficiently and safely, following established UK health and safety executive (HSE) guidelines. This is especially true when comparing the ecosystems of major cordless brands.
Dive deeper into making the right selection:
Makita vs. DeWalt: Which Cordless Drill System is Best for Tradesmen?
Maximizing Battery Life: The Secrets to Cordless Longevity
The shift to cordless tools has delivered unparalleled freedom and efficiency. It has however, introduced a single point of failure, that can be costly which is the lithium-ion battery.
The Lithium-Ion battery pack is often the most expensive component of your cordless system, and its lifespan is far more sensitive to care than the actual tool itself. Mastering battery management is very important to achieving long-term system value.
Ignoring basic battery principles is the fastest way to halve your tool’s useful life and waste hundreds of pounds on premature replacements.
2.1 Understanding the Charge Cycle of a Battery
Lithium-ion cells in a battery degrade naturally over time, but their lifespan is accelerated by two primary enemies: heat and deep discharge. You don’t need to be a scientist, but understanding these fundamental rules will save you a fortune on having to buy replacement batteries.
- Avoid Extreme Temperatures: Never store batteries in a hot place or a freezing shed. Heat is a killer, and extreme cold significantly reduces performance. Always charge batteries when they are at or near room temperature.(20°Celsius)
- No Deep Discharges: Modern lithium-ion batteries do not suffer from the “memory effect,” but draining them completely places immense strain on the cells. Stop using the tool and recharge the battery when it indicates low power, ideally before it hits rock bottom.
- Use Smart Chargers: Always use the manufacturer-matched smart charger. These chargers communicate with the battery’s internal management system to optimize charging speed and prevent overcharging, which minimizes heat exposure during the cycle.

2.2 When Good Batteries Go Bad
Even with the best practise, batteries can still exhibit strange behaviour. These are issues such as rapid draining, refusal to charge, or intermittent power delivery.
These issues often relate to the internal battery management system (BMS) or simple connection faults, rather than a total cell failure. Knowing how to diagnose and potentially reset these issues can save you from buying a new pack.
2.3 The Enemies of Longevity: Heat, Voltage, and Chemistry
A battery’s lifespan is measured in charge cycles, but that cycle count is drastically reduced by three core factors: heat, deep discharge, and poor storage.
- Temperature Stress: Extreme heat is the single worst enemy of lithium-ion chemistry. When the internal cells exceed 45°Celsius, chemical degradation accelerates exponentially. This often happens when a battery is used heavily (high current draw), then immediately placed on a charger. Modern Smart Chargers are designed to communicate with the Battery Management System (BMS) inside the pack, refusing to charge until the temperature drops—this is a critical safety feature you must respect. Never charge batteries in direct sunlight or a hot vehicle.
- Deep Discharge (The BMS Lockout): Unlike older NiCad batteries, Li-ion packs do not suffer from the memory effect, but they are vulnerable to deep discharge. If a cell drops below its minimum safe voltage (typically 2.5V), the BMS permanently locks out the pack to prevent dangerous short circuits or thermal runaway during the next charge attempt. This is why batteries “die” when left fully depleted for months.
Advanced Battery Management: Storage and Usage
To truly maximize battery lifespan, you must manage your inventory like a pro:
- The 60% Storage Rule: For long-term storage (more than 30 days), battery packs should be left at a 50-70% state of charge (SoC). Storing a battery at 100% charge puts the cells under maximum stress, accelerating capacity loss over time.
- Matched Chargers are Mandatory: Always use the manufacturer-matched smart charger. These chargers are tuned to the specific BMS protocols of the brand, managing current and cooling precisely. Using generic, non-communicating chargers voids warranties and risks pack failure.
- Physical Protection: Treat battery packs like high-end electronics. Inspect the contacts regularly for debris (like sawdust or metal filings) and avoid dropping the packs, as internal weld fractures can lead to intermittent failure.
If your packs are dying prematurely, or you’re seeing fault codes on your charger, you need a definitive diagnosis:
Troubleshooting Cordless Tool Battery Issues (Why They Die Fast & How to Fix)
Tool-Specific Care: Saws, Drills, and Grinders
While general cleanliness is important, true tool longevity requires focused, tool-specific maintenance. The needs of any rotary tool such as a drill are vastly different from those of a cutting tool such as a saw.
Ignoring these distinctions leads to excessive wear, reduced efficiency, and eventual failure in specific, high-stress components. This focused approach to care is where professional owners differentiate themselves from casual users.
3.1 The Rotary Foundation: Drills and Drivers

For tools like combi drills, impact drivers, and angle grinders, your maintenance should focus on two key areas: the chuck mechanism and the motor’s airflow.
- Chuck Maintenance: The drill chuck, especially keyless varieties, accumulates dust and fine particles, leading to sticking jaws or slippage. Regularly open the chuck fully, brush out any debris, and apply a drop of light machine oil or PTFE spray to the jaws.
- Motor Health: Dust is the main enemy of the motor. Use compressed air to regularly blow dust out of the tool’s ventilation ports. For older, brushed motors, be mindful of performance drop-off, which may signal worn carbon brushes that need replacing.
Chuck Mechanism Maintenance (Step-by-Step):
The drill chuck, especially keyless varieties, accumulates dust and fine particles, leading to sticking jaws or slippage under high torque.
- Disassembly: Fully open the chuck jaws.
- Cleaning: Use a fine, stiff brush or compressed air to clean out all dust and debris lodged in the internal threads and jaw channels.
- Lubrication: Apply a single drop of light PTFE-based machine oil or silicone spray directly onto the internal threads and down the jaw slides. Work the chuck open and closed fully several times to distribute the lubricant.
- Wipe Down: Wipe away any excess oil immediately to prevent dust from adhering to the outside surface.
Motor Health and Brush Replacement: Dust is the enemy of the motor. Use compressed air to regularly blow dust out of the tool’s ventilation ports.
For older, brushed motors, be mindful of performance drop-off, excessive sparking, or a burning smell, which signal worn carbon brushes.
Replacing carbon brushes is a simple, low-cost maintenance task that can instantly revive a failing brushed tool.
3.2 The Critical Edge: Circular Saws and Mitre Saws

Cutting tools introduce complex mechanical adjustments and one major wear part is of course the blade. Proper saw maintenance directly impacts the quality of your finish and the safety of the cut.
- Alignment Checks: Periodically check the squareness of the saw’s base plate and the accuracy of its bevel and mitre stops. Even slight misalignment causes binding, which dangerously increases kickback risk and strains the motor.
- Base Plate Care: Keep the base plate (shoe) clean and smooth. Fine wax or PTFE spray can help the plate glide smoothly over the workpiece, reducing friction and improving cut control.
3.3 The Blade Factor
Above all, the blade is the single most important part of your saw. A dull blade doesn’t just cut poorly. It creates excessive heat, burns the wood, puts unnecessary strain on the tool’s gears. It also drastically increases the chance of dangerous kickback.
Knowing when to swap out a blade is the single most important maintenance decision you make for cutting tools. Don’t ruin your material with a dull blade or risk kickback. Learn the definitive signs and selection process here:
When to Replace Your Circular Saw Blade (Types and Materials).
The Versatile Workhorse: Multi-Tool Advantage and Care

If there is one tool that epitomizes efficiency for the modern homeowner or tradesman, it is the oscillating multi-tool. Known for its versatility in sanding, scraping, and precision cutting in tight spaces, the multi-tool is the ultimate problem-solver.
However, due to the high-frequency oscillation (up to 20,000 movements per minute), these tools generate significant heat and stress, demanding unique maintenance considerations.
4.1 Focused Maintenance for Oscillation
Unlike drills, the longevity of a multi-tool relies less on battery maintenance and more on cleanliness and accessory management:
- Debris & Dust Control: Fine dust from sanding and cutting often works its way into the ventilation and the quick-change accessory mechanism. Always use a shop vac attachment where possible, and periodically use compressed air to clean the head of the tool to ensure the gears remain cool and dust-free.
- Accessory Quality: The quality of the blade or attachment is non-negotiable. Using dull, cheap accessories forces the tool to work harder, generating excessive heat that can damage the internal motor and bearings. Always invest in high-quality blades designed for the specific material you are cutting.
4.2 The Oscillation Angle: Why Finesse Matters
The oscillation angle determines how quickly a multi-tool can remove material. While a wider angle (4°) means faster cutting for rough removal (like grout), a narrower angle (2.8°) is essential for control, particularly for delicate plunge cuts into expensive trim.
Using the wrong angle and a dull blade puts maximum strain on the tool’s mechanical gearbox.
4.3 Choosing the Right Multi-Tool
Given their wide range of uses, selecting the right multi-tool is a balance of power, ergonomics, and accessory compatibility. Homeowners prioritizing occasional use may prioritize budget, while professionals require robust build quality, high-speed oscillation, and vibration reduction for continuous use.
Knowing the difference ensures you buy a tool that not only lasts but performs reliably on every project.Ready to find the single tool that solves countless problems? Check out our detailed analysis:
In-Depth Review: Best Value Multi-Tools for the UK Homeowner:Review and Buying Guide
Summary and Conclusion
You’ve now established a comprehensive foundation for tool mastery. True professional tool ownership is a cyclical process, built upon the three core pillars we’ve explored: Diligent Safety, Proactive Maintenance, and Informed Selection.
- Safety is Non-Negotiable: Always start with the correct PPE and a clean worksite.
- Batteries are Investments: Treat your lithium-ion packs like the expensive, high-performance components they are, avoiding temperature extremes and deep discharge cycles.
- Specific Care Pays Off: From cleaning drill chucks to swapping saw blades, targeted maintenance prevents minor issues from escalating into tool-killing failures.
By following the deep insights and expert guides provided, you not only protect yourself and your materials, but you guarantee the longest possible lifespan for your gear, protecting your financial investment.
Your Next Step: Putting Knowledge to Work
We’ve given you the knowledge to care for your tools; now it’s time to equip yourself with the best tools and accessories the UK market has to offer.
Whether you’re ready to invest in a superior cordless system or just need to stock up on high-quality replacement blades, we have curated the top products based on performance, durability, and value.