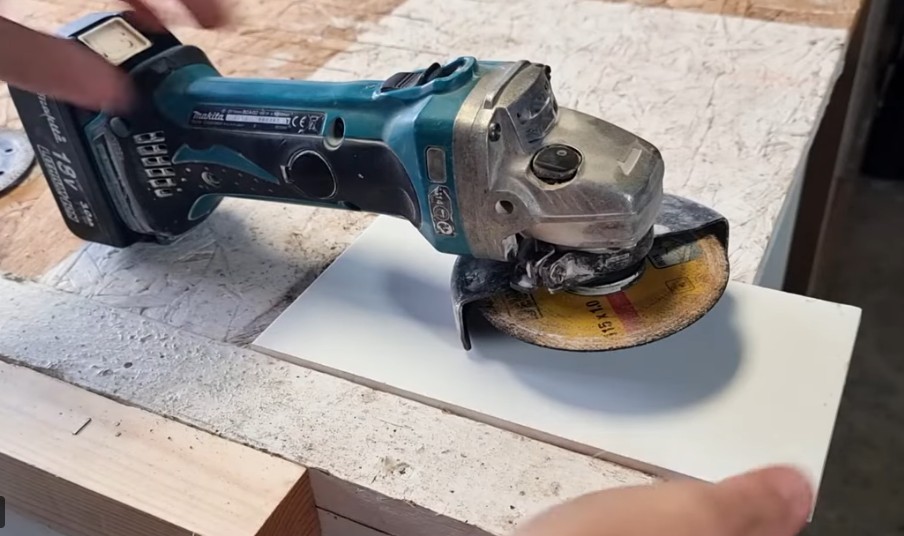
⭐ How to Cut Tiles with an Angle Grinder (Clean, Accurate Cuts UK)
Cutting tiles with an angle grinder is a handy skill when you need to make quick cuts, curved cuts, or notches that a tile cutter can’t handle. Whether you’re fitting around pipes, sockets, or awkward corners, an angle grinder gives you the flexibility to shape tiles accurately.
I’ve used this method for years in my workshop here in Northern Ireland, and in this guide I’ll show you the safest, cleanest way to cut tiles — even if you’re a complete beginner.
Before you start, I recommend reading my Angle Grinder Safety UK guide. Tile cutting produces dust, sparks, and sharp edges, so proper PPE is essential.
⭐ What You’ll Need
- Angle grinder (115mm is ideal)
- Diamond tile‑cutting disc (continuous rim for clean cuts)
- Safety glasses or face shield
- Dust mask
- Gloves
- Clamps or a stable workbench
- Marker or pencil
- Water spray bottle (optional for dust control)
If you’re unsure about disc types, see my Angle Grinder Disc Types Explained.
⭐ Safety First

Cutting tiles creates fine dust and sharp fragments. Always wear:
- eye protection
- a dust mask
- gloves
Work outdoors if possible, and clamp the tile securely to prevent slipping.
For full safety advice, see my Angle Grinder Safety UK.
⭐ Step‑by‑Step: How to Cut Tiles with an Angle Grinder
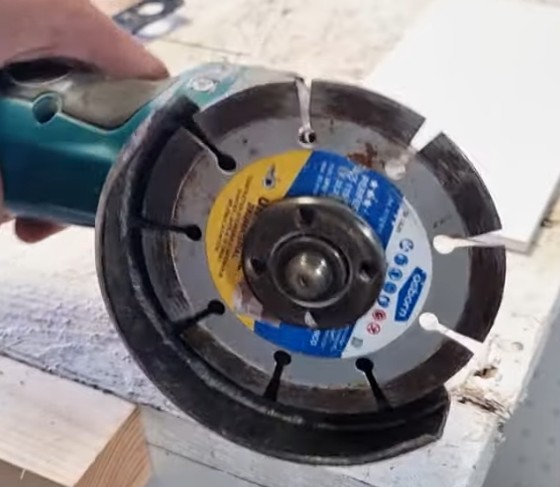
Step 1: Choose the Right Disc
Use a continuous rim diamond disc. Segmented discs cut faster but chip tiles more easily.
A continuous rim disc gives the cleanest finish.
Step 2: Mark Your Cut Line

Use a pencil or marker to draw a clear line on the tile.
For curved cuts, mark the shape carefully — the grinder will follow it easily.
Step 3: Secure the Tile
Clamp the tile to a workbench or rest it on a piece of scrap wood.
Never hold the tile with your hand while cutting.
Step 4: Start the Grinder and Let It Reach Full Speed
Let the disc spin up fully before touching the tile.
This reduces chipping and gives you a smoother cut.
Step 5: Begin the Cut Gently
Lower the disc onto the tile with light pressure.
Let the disc do the work — forcing it will cause chips.
For straight cuts, score the line lightly first, then deepen it gradually.
Step 6: Follow the Line Slowly
Move along your marked line at a steady pace.
For curved cuts, make small, shallow passes and work your way around the shape.
If dust becomes excessive, use a light spray of water (if your grinder and environment allow it).
Step 7: Smooth the Edges
After the cut:
- use the diamond disc to lightly smooth the edge
- remove any small chips
- tidy up the cut line
This gives a professional finish.
⭐ How to Cut Different Types of Tile
Ceramic Tiles
Easy to cut — the grinder will glide through them.
Porcelain Tiles
Harder and denser — take your time and make multiple shallow passes.
Stone Tiles (slate, marble, granite)
Use a high‑quality diamond disc and work slowly to avoid cracking.
⭐ Common Mistakes to Avoid
- Using a segmented disc (causes chipping)
- Forcing the grinder
- Not securing the tile
- Cutting too quickly
- Not wearing a dust mask
- Trying to cut the full depth in one pass
⭐ Recommended Tools & Guides
FAQs
Can I cut tiles indoors?
You can, but it creates a lot of dust. Outdoors is better.
Which disc gives the cleanest cut?
A continuous rim diamond disc.
Why is my tile chipping?
You may be pushing too hard or using the wrong disc.
Can I cut curves with an angle grinder?
Yes — make small, shallow passes and follow your marked line.
⭐ My Final Thoughts
Cutting tiles with an angle grinder is straightforward once you understand the technique. With the right disc, a steady hand, and proper safety gear, you can make clean, accurate cuts that look professional. Take your time, score the line first, and let the tool do the work.