Some people like to change their skirting boards to change the look of their room, and some people in the UK, do it as part of a general home improvement and others simply because they have to. It is considered to be one of the easier types of DIY home improvement. If you haven’t done it before, it may seem to be a bit of a daunting task.
Cutting skirting boards accurately is key to a clean, professional finish, especially around corners. A mitre saw makes the job faster and more precise than using a hand saw or mitre box. This guide walks UK DIYers through the process step-by-step.
Tools You Need
- Mitre saw (compound or sliding) or mitre box
- Tape measure and pencil
- Spirit level or square
- Safety gear (gloves, goggles)
- Optional: mitre saw protractor for tricky angles
Tip: For irregular corners, use an angle finder and divide the result by 2 to get your mitre setting.
Planning Your Project
Removing old skirting
The most common way of removing old skirting is a hammer and some type of pry bar. If you don’t own a pry bar, then an old chisel or an old screwdriver will do the job. It depends a lot how the skirting was fitted.
In older homes, many have just been cemented into the wall, and removing them takes brute force and ignorance. There is no easy method. Make sure any old nails have been fully removed.
Almost every single time, this leaves a lot of mess. There will be holes for sure, and some plaster may have cracked or fallen off. You need to repair this first. I use the spray foams for any hole filling, as it’s just quick and easy.
Plaster repairs can be done by using a filler, which you will need to apply, allow to dry and then sand down to a very smooth finish. It is likely you may need to paint the walls after that.
I have never done a job yet that didn’t need that, unless you are using a taller skirting board.

What Stage to add the new skirting?
If you are either laying tiles, a wooden floor or a laminate floor then go ahead and do that first. The skirting boards will go on after you have completed that work. On the other hand if you are laying carpet, vinyl tiles or vinyl flooring then it should be skirtings first and the floor covering later.
The reasons for these decisions are simple enough. Wooden flooring and tiles will probably be there for a very long time, whereas carpets and vinyls will be changed more often. Every time that you wanted to change the look of your carpet or replace your vinyl, you would not want to also have to remove or replace your skirting boards.
All of this takes time, so try and work out how long it will take to remove the old skirting and then tidy up the mess that it has left. If laying floors, then you will need time for that.
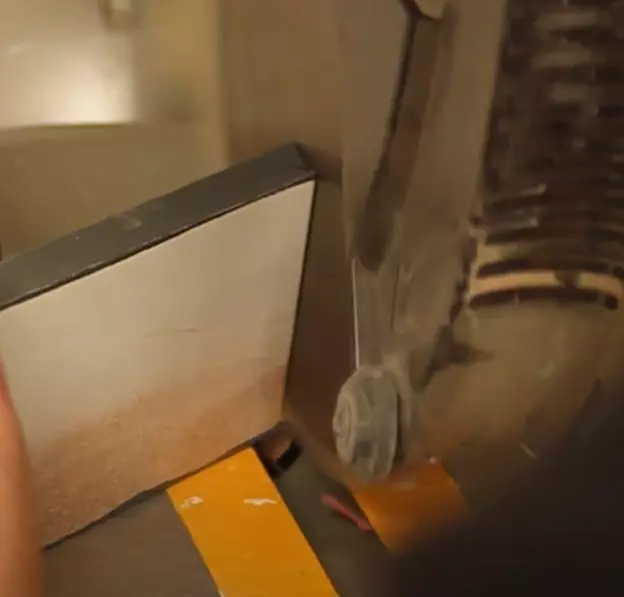
Step-by-Step: Cutting Skirting Boards
Step 1 – Measure the Wall Length
- Use a tape measure to mark where each board will sit
- Account for corner joints and expansion gaps
Step 2 – Set the Mitre Saw Angle
- For a standard 90° corner, set the saw to 45°
- For outside corners, cut the board ends away from the wall
- For inside corners, cut the board ends toward the wall
Tip: Always test your angle on scrap wood before cutting the final piece.
Step 3 – Position the Board
- Lay the board flat against the saw fence
- Ensure the bottom edge is flush with the base
- Clamp if needed for stability
Step 4 – Make the Cut
- Power on the saw and lower the blade slowly
- Let the blade do the work—don’t force it
- Check the cut for smoothness and fit
Types of Skirting Boards

Some people prefer real wood, but the cheap and more popular choice is MDF skirting. Skirtings boards also have slightly different profiles and the most common are bullnose, chamfered, ogee, and torus.
MDF skirting is a popular choice as is softwood skirting. Veneers in light oak, pine etc are also available. Some of the MDF type can also be what is called “white primed.”
You can get these in various designs such as round, chamfered and rebated or just as a plain option. It simply comes down to personal taste and how much budget you have available.
These skirting boards tend to come in a number of standard lengths which are:-
- 2,400 mm (7.87 feet)
- 3,600 mm (11 feet and 8″)
The widths can vary quite and some typical measurements are
- 94 mm (3.7″)
- 119 mm (4.68″)
- 169 mm (6.65″)
Typical prices per piece of skirting simply depend on the type that you buy with the cheapest being around £4-5 per length and going all the way up to £40-50 per length.
It can be expensive to replace skirting boards if you opt for something like a high quality Oak Veneer. The cheaper options are usually something like a basic MDF board.
Measuring a Room for Skirting Boards
This is your starting point to see how much skirting you need. Measure around the room and add a 20% figure to that number. You need to allow that amount for cutting and waste.
- For example if a room measures 4 metres by 3 metres. The skirting measurement would be 4+4+3+3 which is 14 m. Then add 20% which is 14/5 = 2.8 and a total of 16.8 metres or 16,800 mm.
- If the length of skirting you bought was 2,400 mm then you would need 16,800/2400 which would be 7 boards.
- If the length of skirting you bought was 3,600 mm then you would need 16,800/2400 which would be 4.6 boards so you would need to buy 5 boards
Hopefully all of that makes sense but just be sure to measure the room carefully as you do not want any waste. If you do buy extra boards most stores will take them back providing they have not been damaged.
Other Items You Will Need for Skirting Boards
So if you have the tools and have measured and picked out your boards, then you are almost good to go.
You may however need some panel pins and screws, some type of grabbing adhesive, and the all important wood filler.
It really does depend on the condition of the wall you are attaching the skirting boards too. Large gaps will need to be filled as an example.
Fitting the Skirting Boards
Rather that write this all down it is much easier to see it being done on video, so here is one of the best that I have watched. It is a short and sweet version for those who just want to get the overall process.
For those who like a lot more detail these two really excellent videos. These go into a lot more detail and take you slowly through the process.
So hopefully you have found this helpful. As you can see all of this was done using a mitre box. A power mitre saw just makes this even quicker.
Clearly the power saw will be more accurate and will save you a lot of time and effort. So the next time you need skirting boards done, this should help you get through the task without any issues. My strong advice is to measure the sizes carefully, decide which type of board you want or can afford, and then go and purchase it.
Going to a builder’s yard and buying in bulk will always save you money. Once you have made your decision then it is time to start fitting the skirting board. As us old carpenters say, measure twice and cut once.
Cutting skirting boards with a mitre saw is one of the most satisfying DIY tasks once you get the hang of it. With the right angle settings and a steady hand, you’ll get clean joints and a polished finish every time.
Want more cutting tips and tool comparisons? Check out: