⭐ How to Remove Rust with an Angle Grinder (Fast & Effective Guide UK)
Removing rust with an angle grinder is one of the quickest ways to restore metal. Whether you’re cleaning up old tools, prepping steel for painting, or restoring a gate or trailer, an angle grinder can strip rust in seconds.
I’ve been doing this for decades in my workshop here in Northern Ireland, and in this guide I’ll show you the safest, most effective way to remove rust — even if you’re a complete beginner.
Before you start, I recommend reading my Angle Grinder Safety UK guide. Rust removal throws off dust, debris, and wire fragments, so proper PPE is essential.
⭐ What You’ll Need
- Angle grinder (115mm is ideal)
- Wire cup brush or wire wheel
- Flap disc (optional for smoothing)
- Safety glasses or face shield
- Gloves
- Dust mask
- Clamps or a stable workbench
If you’re unsure about disc types, see my Angle Grinder Disc Types Explained.
⭐ Safety First
Rust removal throws off:
- fine dust
- metal particles
- wire bristles
Always wear:
- eye protection
- gloves
- a dust mask
Wire wheels can shed bristles at high speed, so keep your body slightly off to the side of the tool.
For full safety guidance, see my Angle Grinder Safety UK.
⭐ Step‑by‑Step: How to Remove Rust with an Angle Grinder
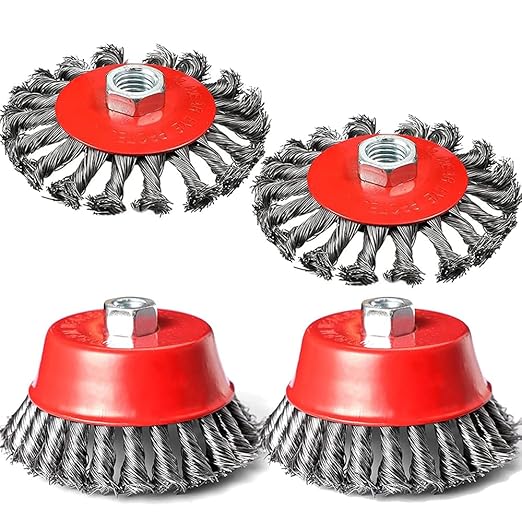
Step 1: Choose the Right Attachment
For rust removal, use:
- Wire cup brush → best for large flat areas
- Wire wheel → best for edges, corners, and tight spots
For smoothing after rust removal, use a flap disc (60–80 grit).
Step 2: Secure the Workpiece
Clamp the metal securely to a bench or vice.
Rust removal requires pressure, so the workpiece must not move.
Step 3: Start the Grinder and Let It Reach Full Speed
Let the wire wheel spin up fully before touching the metal.
This gives you a smoother, more controlled clean.
Step 4: Begin Cleaning with Light Pressure
Hold the grinder at a slight angle and move it steadily across the rusted area.
Let the wire do the work — pressing too hard reduces effectiveness and wears out the wheel.
Step 5: Work in Overlapping Passes
Move slowly and overlap each pass to ensure even cleaning.
For heavy rust, make several passes until the metal is bright and clean.
Step 6: Switch to a Flap Disc (Optional)
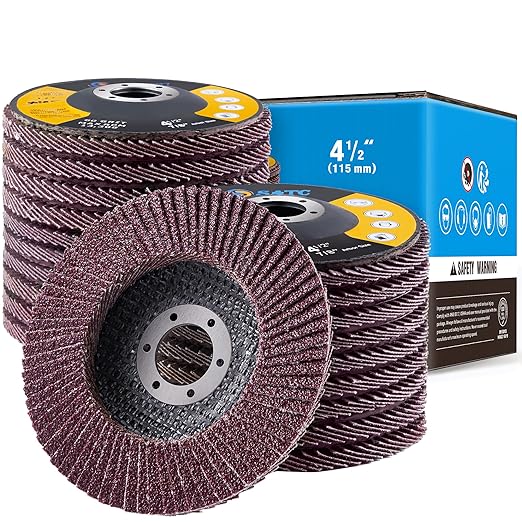
If you want a smoother finish:
- switch to a 60–80 grit flap disc
- lightly smooth the surface
- remove any remaining rust or pitting
This is ideal before painting or priming.
Step 7: Wipe Down the Surface
After cleaning:
- brush off dust
- wipe with a cloth
- apply primer if painting
Bare metal will start rusting again quickly, so seal it soon after cleaning.
⭐ Which Attachment Should You Use?
| Job | Best Attachment |
|---|---|
| Heavy rust | Twisted wire cup |
| Light rust | Crimped wire wheel |
| Edges & corners | Wire wheel |
| Smoothing after cleaning | Flap disc |
| Preparing for paint | Flap disc (80 grit) |
⭐ Common Mistakes to Avoid
- Pressing too hard
- Using the wrong wire type
- Not wearing eye protection
- Holding the grinder flat
- Using a cutting disc (dangerous)
- Leaving bare metal unprotected
⭐ Recommended Tools & Guides
FAQs
Will a wire wheel damage the metal?
Not usually — wire wheels remove rust without removing much metal.
Can I remove rust from painted metal?
Yes — the wire wheel will strip paint and rust together.
Why is my wire wheel shedding bristles?
This is normal. Always wear eye protection.
Can I use a flap disc instead of a wire wheel?
Yes, but flap discs remove more metal and are better for smoothing than heavy rust removal.
⭐ My Final Thoughts
Removing rust with an angle grinder is fast, effective, and ideal for restoring old metal. With the right wire wheel, proper safety gear, and a steady hand, you can clean rusted surfaces in minutes. Take your time, let the tool do the work, and always protect bare metal afterwards.